Sunday, August 05, 2012

Paula Deen: Corn Casserole


Everyone seems to love the corn casserole that Paula Deen has floating around the internet.  Even my sister claims to love it.  And I....have never had it.  I'm not sure how I missed out on this experience that everyone is raving about.  So I decided I would just have to make it and see what's what.

And then I saw the recipe.  A box of cornbread mix.  A tub of sour cream.  A bag of cheese.  Enough butter to choke a fat man.  I'm starting to understand why everyone loves the darn thing.  How could you not with all of that?  Butter will fix a great many sins, and that much butter will pretty much cover up everything else.  Well, I certainly couldn't rationalize making something so over-the-top, so I did some fiddling and tweaking, and I got a homemade version with less fat that still tastes AMAZING.  People weren't kidding, this thing is good.

Corn Casserole
Adapted from Paula Deen

⅔ cup all-purpose flour
½ cup yellow cornmeal
2 tablespoons granulated sugar
1 tablespoon baking powder
½ teaspoon salt
1 (15¼-ounce) can whole kernel corn, drained
1 (14¾-ounce) can cream-style corn
1 cup sour cream
¼ cup (½ stick) unsalted butter, melted
¾ cup shredded sharp Cheddar cheese

Preheat the oven to 350°F.

In a large bowl, combine the flour, cornmeal, sugar, baking powder, and salt.  Add the two cans of corn, sour cream, butter, and cheese.  Pour the mixture into a 2-quart casserole dish.  Bake for 45 minutes, or until golden brown.  Let stand at least 5 minutes and then serve warm.

Makes 6 to 8 servings

Saturday, August 04, 2012

A New Turn in the South: Squash Casserole


I have my usual squash casserole standby, and I like it just fine.  It's traditional...cracker crumbs and boiled squash and cheese.  The whole shebang.  But what if it could be fancier?  What if I could add some oomph to the old standby?  What if it doesn't end up cooking through in the time the recipe says it should?  This one is definitely delish with the leek crema, but keep a look out for the squash taking quite a bit longer than 35 minutes to get soft.  Unless you like raw squash, of course.

Squash Casserole
From A New Turn in the South by Hugh Acheson

1 tablespoon cold unsalted butter
3 pounds summer squash sliced lengthwise to 1/4-inch thick slices on a mandoline or with a knife
2 cups Leek Crema
¼ teaspoon kosher salt
1 teaspoon fresh ground black pepper
1 tablespoon chopped fresh thyme
½ cup freshly made bread crumbs
½ cup grated Parmigiano-Reggiano

Preheat the oven to 350°F.

Coat an 8x10-inch casserole dish with the butter by rubbing it as if you were waxing a car.  Arrange the squash in a single layer in the dish.  It's all right if you shingle and overlap edges minimally.  We are making a six-layer casserole, so think about that in the next few steps.  We need to allocate the ingredients accordingly.

Evenly coat the first level of squash with a ladle of crema, a pinch of salt, a pinch of pepper, a bit of thyme, a sixth of the bread crumbs, and a sixth of the Parmigiano.  Repeat these steps five more times, and then cover the casserole with a fitted lid or foil.  Bake for 25 minutes covered and 10 minutes more uncovered, or until the top becomes nice and golden brown.  Allow to cool for 10 minutes before serving.

Makes 6 servings

Leek Crema
2 teaspoons unsalted butter
2 leeks, white part only, cleaned and minced
Pinch of kosher salt
2 cups heavy cream

In a small saucepan, melt the butter over medium heat.  Add the leek and 2 tablespoons water.  Cover and cook, steaming the leek for about 5 minutes, until very tender.  Add the salt and cream and warm through.

Remove the saucepan from the heat, puree the mixture in a blender, and strain through a fine strainer.

Makes 3 cups

Wednesday, August 01, 2012

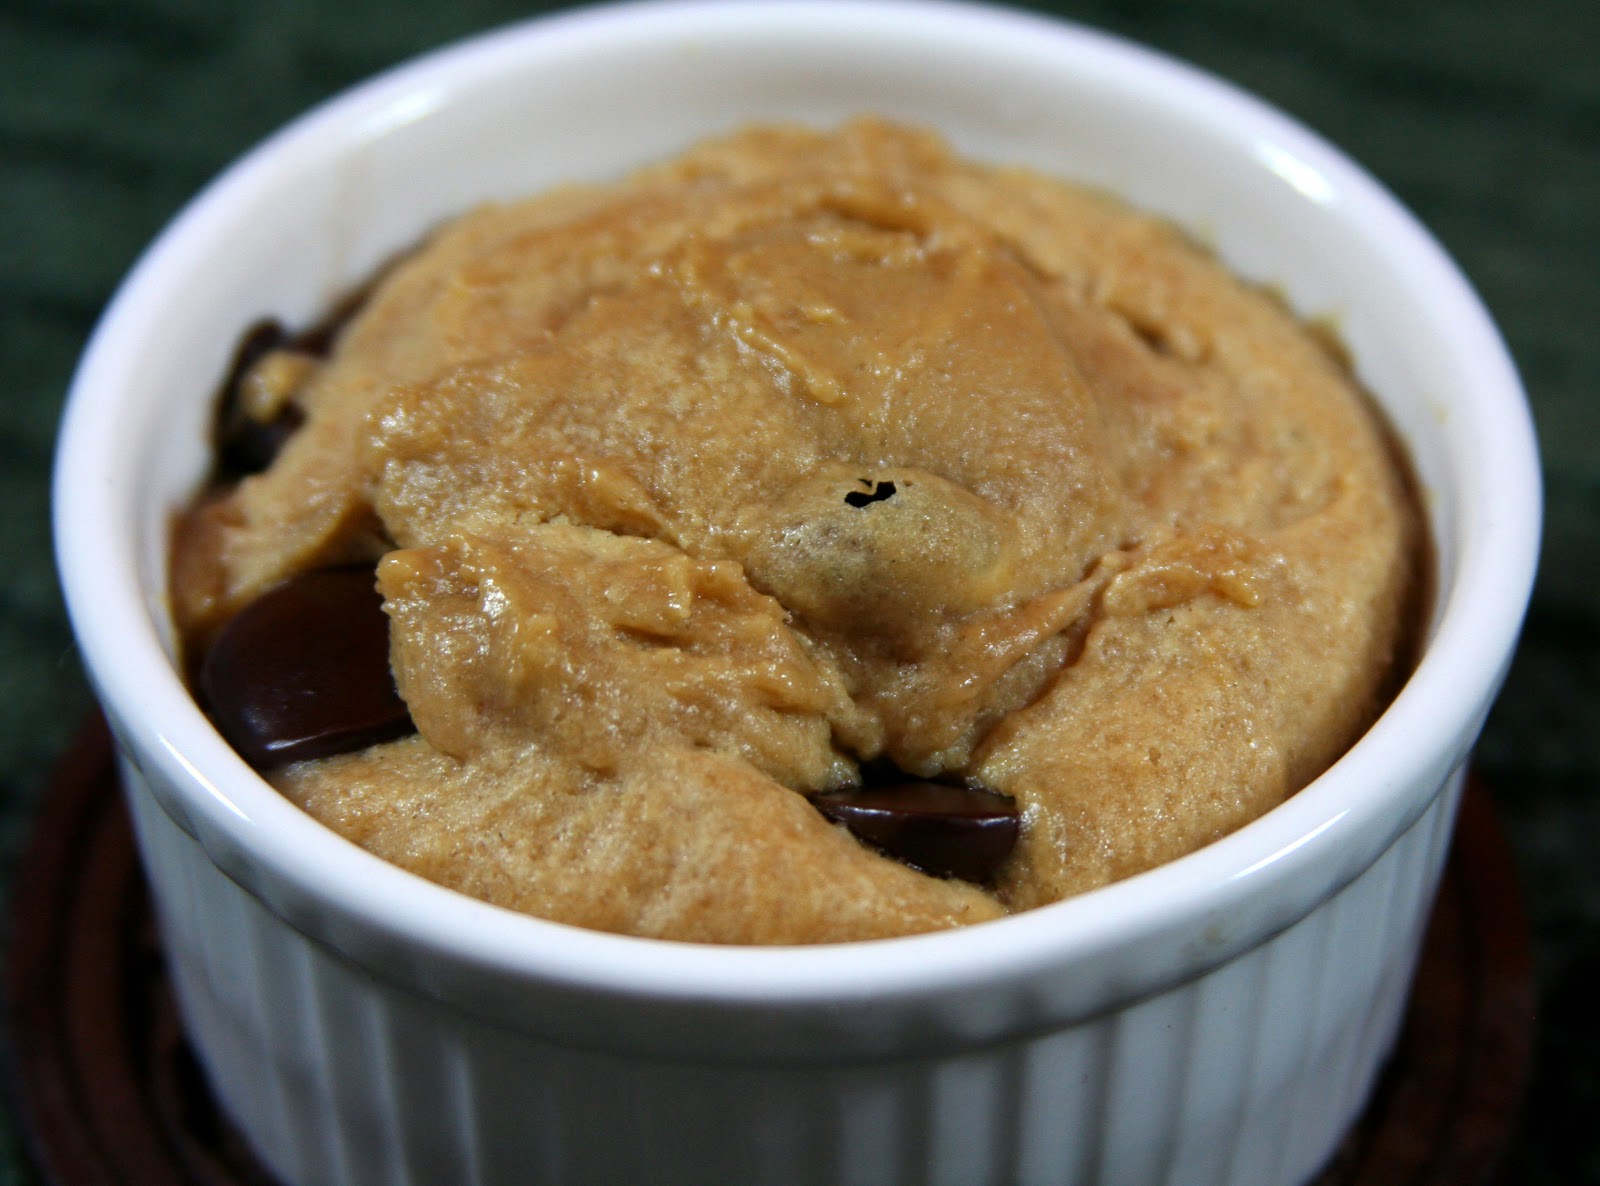
No. 2 Pencil: Microwave Chocolate Chip Cookie


If you're like me, you truly believe that the art of baking reaches it's highest and most heavenly form in the chocolate chip cookie.  Yep, I said it.  You can bring me the most amazing, detailed, labor-heavy cake in the world, with the most luxurious fillings, and I would probably still choose the chocolate chip cookie.  Warm from the oven and gooey in the middle, it's perfect.

Well, not everyone has time to whip up an entire batch of chocolate chip cookies, and when you're living alone, it seems a little like...overkill.  You can only eat so many before your stomach starts to hurt and you get a sugar rush that just won't go away.  Not that that's bad, it just makes sleeping difficult.  The perfect solution?  A one-serving deep dish chocolate chip cookie that pops in the microwave and comes out a minute later ready for consumption.  Now, I normally don't like cooking in the microwave, but if it's going to get my cookie to my face faster, I'm all for it.

Microwave Chocolate Chip Cookie
From No. 2 Pencil blog

1 tablespoon unsalted butter, melted
1 tablespoon granulated sugar
1 tablespoon packed light brown sugar
3 drops of vanilla extract
Pinch of salt
1 large egg yolk
Scant ¼ cup all-purpose flour
2 heaping tablespoons chocolate chips

Combine butter, sugars, and vanilla.  Mix in egg yolk.  Add flour, and mix well.  Add chocolate chips.  Microwave in a small ramekin for 40 to 60 seconds on HIGH.

Monday, July 30, 2012

Ghirardelli: White Chocolate Raspberry Muffins


Years ago, when I was living in New Jersey, I discovered a book of recipes from Ghirardelli chocolate.  They were all decadent and absolutely fabulous, and I drooled on every page.  I also started a collection of chocolate bars in my pantry that probably would have concerned my family.  And what did I discover in those chocolate bars?  There were MORE recipes in the wrappers.

I've never been a big lover of white chocolate, as I'm not sure we should even be calling it chocolate when it has no cocoa solids, but that's just me apparently.  However, when I saw the recipe for muffins with fresh raspberries and white chocolate chunks, I knew it was something I needed to make.  I mean, that's a pretty fancy muffin...fresh berries and white chocolate?  That's right up my alley.

The only thing I can tall you is to keep checking on the muffins because I'm not entirely convinced they need as much cooking time as is specified.  They seem to go from perfect to overcooked while you're busy blinking.  I stand at the little window to my oven compulsively watching them.  But that's just me.

White Chocolate Raspberry Muffins
From the Ghirardelli chocolate bar wrapper

¼ cup unsalted butter, softened
½ cup granulated sugar
1 large egg
1 teaspoon vanilla extract
2 cups all-purpose flour
1 tablespoon baking powder
½ teaspoon salt
1 cup whole milk
8 ounces white baking chips
6 ounces (½ pint) fresh raspberries
2-3 tablespoons demarara sugar

Preheat the oven to 375°F.  Prepare 2 muffin pans with 18 liners.

In a medium-sized bowl, cream butter and sugar until smooth.  Add the egg and vanilla extract, and stir until combined.

In a large bowl, whisk together the flour, baking powder, and salt.  Gradually add the flour to the creamed mixture alternately with the milk, beginning and ending with flour.  The mixture will be slightly lumpy.  Do not overmix, or it will result in a tough muffin.

Stir in the white baking chips.  Carefully fold in the raspberries without breaking the berries.  Fill the prepared muffin cups about ¾ full.  Sprinkle the tops of the muffins with the demarara sugar.

Bake the muffins for 16 to 20 minutes, or until a toothpick inserted in the middle of the muffin comes out clean.  Cool the muffins in the pans on a wire rack for 5 minutes, then remove the muffins to the rack to cool completely.

Makes 18 muffins

Sunday, July 22, 2012

Food.com: Kartoffelklöße (German Potato Dumplings)


When I made sauerbraten last night, I also replicated a side dish that my mom says my grandmother served with her sauerbraten.  They are german potato dumplings with a little surprise of butter toasted bread cubes in the middle.  I couldn't remember hearing about these until my mom mentioned them.  And even then, the recipe was trial and error, trying to get it like the original.

These dumplings basically amount to mashed potatoes stuffed with breadcrumbs.  They're pretty plain on their own, but with sauerbraten gravy drizzled over the top, they're pretty delicious.  And I always like a little surprise in my dinner, especially a surprise that's fried in butter.  I personally think they might need a little bit of finely chopped parsley in the potato mixture, just to break up the never-ending whiteness.

Kartoffelklöße (German Potato Dumplings)
Adapted from food.com

1½ pounds russet potatoes (about 2 large)
1½ teaspoons salt
 teaspoon nutmeg
½ cup all-purpose flour
 cup cornstarch
1 large egg
2 slices good quality white bread, such as sourdough
1 tablespoon unsalted butter
1 tablespoon vegetable oil

Trim the crusts off the bread and discard.  Cut the bread into ½-inch cubes and fry them in butter and oil until golden brown, then transfer them to a paper towel to drain.  You need about 48 little cubes.

Cook scrubbed, unpeeled potatoes in a large pot of boiling salted water until tender, about 45 minutes.  Drain and cool slightly.  Peel the potatoes and then cut them into large pieces.  Refrigerate until cold, about 30 minutes.

Mash the potatoes with a fork or run them through a ricer into a large bowl.  Mix in the salt and nutmeg.  Add the flour and cornstarch.  Using your hands, knead the mixture until a smooth dough forms, adding more flour if the dough is sticky.  Mix in the egg.

Form the dough into 12 large balls, using ¼ cup of potato for each.  Insert 4 bread cubes in the center of each dumpling and close the dough around the bread cubes to form smooth balls.

Working in batches, cook dumplings in a large pot of nearly boiling salted water for 10-15 minutes or until the dumplings rise to the top and remain floating.  Make sure the dumplings do not stick together as they cook.  Using a slotted spoon, transfer the dumplings to a large bowl and keep covered with a damp kitchen towel until all of the dumplings are cooked.

Makes 12 dumplings

Saturday, July 21, 2012

The Cook's Blessings: Sauerbraten (German Sour Pot Roast)


I seem to be on a kick lately with recipes from my family's past.  Tonight I made something I have never had before: sauerbraten.  This is another recipe that we lost when my grandmother died, and I have been trying to find something to replace it.  I originally saw this recipe in a collection of recipes from a church in Baltimore, so I'm hoping this is pretty close to the original.  My mom says it has been so long though, she doesn't remember if it is the same!

Coming from someone who has never tried it, this roast is something completely different.  You definitely have to like sour things, because it's sour.  Oddly beefy and tender, yet sour.  I'm still not sure what to think. It definitely helps putting the gingersnaps in the gravy, and I'm thinking maybe even some cream wouldn't hurt.  I think I could get used to this...

Sauerbraten (German Sour Pot Roast)
Adapted from the 1965 edition of The Cook's Blessings by Demetria Taylor

1 (3- to 3½-pound) beef rump roast
1½ cups red wine vinegar
1½ cups water
1 large onion, sliced
½ lemon, sliced
6 whole cloves
6 juniper berries
3 bay leaves
6 peppercorns
1½ teaspoons salt
1½ tablespoons sugar
3 tablespoons flour
2 tablespoons oil
¼ cup butter
¼ cup flour
2 teaspoons sugar
8 gingersnaps, crushed very finely

Place the meat in a large deep bowl.  Combine the vinegar and next 9 ingredients; pour over the meat.  Cover; refrigerate 36 to 48 hours, turning meat twice each day.

Lift meat from bowl; pat dry with paper towels.  Rub lightly with flour.  Heat the oil in a large skillet over moderate heat; brown the meat well on all sides.  Put the meat in a large Dutch oven.  Strain the vinegar marinade and add 2 cups to the meat.  Cover and simmer for 3 hours.

Melt the butter in a skillet; blend in the flour and sugar.  Add the remaining strained vinegar mixture; cook and stir until thickened.  Add the mixture to the meat.  Simmer for another ½ hour or until the meat is tender.  Stir the gingersnaps into the gravy; stir until thickened.  If the gravy is lumpy, run it through a blender to smooth it out.

Makes 6 to 8 servings

Friday, July 20, 2012

Better Homes and Gardens New Cookbook: Spanish Tomato Rice


When my maternal grandmother died, all of her recipes went with her.  My mom doesn't remember her ever using a cookbook, and she rarely used clippings from newspapers and magazines.  We're not sure how she learned to cook the amazing things she made, or how she remembered them all, but they were supposedly fantastic (she died when I was 2).  My mom has tried off and on to recreate the dishes she remembers from her childhood, and Spanish rice is one of those things.

Most of the rice served at Tex-Mex restaurants here in Texas is pretty dry, with some peas and carrots occasionally thrown in the mix.  My mom remembers her mother's rice being rice and moist, with bacon on top.  Sounds amazing, right?

Well, we finally decided that this recipe from Better Homes & Gardens is probably as close as we're going to get.  It meets all of the requirements and is pretty darn tasty.  I mean, how can you go wrong with bacon sprinkled on top?  If you're a Texan, you might need some additional spice (cayenne pepper maybe?), but since my grandmother lived in Maryland, I have a feeling this dish is just right.

Spanish Tomato Rice
From the 1974 edition of the Better Homes and Gardens New Cookbook

In a 10-inch skillet, cook 8 slices of bacon till crisp; remove.  Pour off half the fat.  In remaining fat, cook 1 cup finely chopped onion, and ¼ cup chopped green pepper till tender but not brown.

Add one 1-pound can tomatoes, 1½ cups water, ¾ cup uncooked long-grain rice, ½ cup chili sauce, 1 teaspoon salt, 1 teaspoon brown sugar, ½ teaspoon Worcestershire sauce, and dash pepper.  Cover and simmer 35 to 40 minutes.  Crumble bacon on top.  Trim with parsley.

Makes 6 servings

Sunday, July 15, 2012

Family Circle: Carrot-Zucchini Bar Cookies with Cream Cheese Frosting


There are always recipes that you eat as child that you associate with comfort and love.  Things your mom makes for you that show you just how much she cares.  And when you're an adult, just one bite of these things can bring you right back to those days.  You can remember what it was like to sit down at the table and have a plate put in front of you with something delicious on it.

My mom was pretty big on cutting recipes out of the magazines that she subscribed to, mainly Family Circle, Woman's Day, and Southern Living.  She was always finding amazing new things to try.  And as much as I bugged her when something didn't turn out or just wasn't a good recipe (like the spoiled brat I am), I have to admit now that I'm proud she had the nerve to try new things with three little kids at her knees.

One thing I really remember about my childhood is the sweets.  It seemed like my mom had a never-ending treasure trove of amazing sweet things to tempt us with.  Some of these she got out of her old standby, the Better Homes and Gardens New Cookbook (with the plaid cover, I'm sure your mom had one, too!).  But this amazing recipe she got out of Family Circle magazine many years ago.  I don't see it around the internet for some reason, but it's delicious.  Moist, sweet, and tangy.  And it's a perfect way to get some extra nutrition into active children.  Still makes me nostalgic.

Carrot-Zucchini Bar Cookies with Cream Cheese Frosting
From Family Circle magazine

 cup firmly packed light brown sugar
½ cup unsalted butter, at room temperature
1 (3-ounce) package cream cheese, at room temperature
1 large egg
1 teaspoon vanilla extract
1½ cups flour
1 teaspoon baking powder
Dash salt
 cup coarsely grated carrot
 cup coarsely grated zucchini
½ cup golden raisins
Cream Cheese Frosting

Preheat the oven to 350°F.  Grease a 9x9x2-inch square baking pan.

Beat together the brown sugar, butter, and cream cheese until fluffy.  Beat in egg and vanilla.  Beat in flour, baking soda, and salt until well blended.  Stir in carrot, zucchini, and golden raisins.  Spoon into the prepared pan and spread evenly.

Cake for 30 minutes, or until a toothpick comes out clean.  Cool on a wire rack for 10 minutes.  Invert the cake on the wire rack; cool completely.  Frost with Cream Cheese Frosting.

Cream Cheese Frosting

¼ cup unsalted butter
1 (3-ounce) package cream cheese
1½ cup confectioner's sugar
½ teaspoon vanilla extract

Beat together the butter, cream cheese, and sugar until smooth and fluffy.  Beat in vanilla.

Wednesday, July 04, 2012

Cooking My Way Back Home: Peach-Blueberry-Brown Butter Crisp


With all the fabulous produce out on the market right now, I decided to try another recipe from Cooking My Way Back Home that had caught my eye.  It's a fruit crisp, and it uses some fruits that are at their peak right now: peaches and blueberries.  I haven't really tried anything with that particular combination, but it sounded delicious.

When I went shopping for the ingredients, I had quite a bit of trouble finding tapioca flour.  The only place that carried it sold it in a big bag, and with only 1 tablespoon required, I certainly wasn't going to shell out $5 for just one ingredient.  Cornstarch worked just fine.

While the ingredient list doesn't seem very long, it seems like it took forever to bring together the ingredients for the topping (and about a million dishes).  And then when I went to put the whole thing in a casserole dish, I realized exactly how much topping that was...  It was so much topping that I almost thought I had done something wrong.  It was mounded over the top of the fruit so high it was several inches deep.  I wasn't even sure the darn thing would cook.  I can't believe this recipe was actually tested, because unless you love the crunchy topping ten times more than the actual fruit, this is not a good ratio.  If I make it again, I'll cut back the topping by at least half, possibly more.  I have left the recipe below as is.

The taste of the fruit was actually pretty good, all things considered.  And I really liked the graininess that the cornmeal brought to the topping.  Pretty delicious once the topping was scraped down to a reasonable level.  Oh, and you HAVE to top it with vanilla bean ice cream.  That is required.

Peach-Blueberry-Brown Butter Crisp
From Cooking My Way Back Home by Mitchell Rosenthal

6 to 8 peaches, halved, pitted, and sliced
1 pint blueberries
¼ cup sugar
1 tablespoon tapioca flour
1½ tablespoons freshly squeezed lemon juice

Topping:
1 cup (½ pound) unsalted butter
¼ vanilla bean, split lengthwise
1¼ cups all-purpose flour
1¼ cups yellow cornmeal
¾ cup coarsely ground toasted almonds
¾ cup firmly packed dark brown sugar
¼ cup granulated sugar
½ teaspoon ground cinnamon
¼ teaspoon freshly grated nutmeg

Preheat the oven to 325°F.  Have ready a 2-quart baking dish.

In a bowl, combine the peaches, blueberries, sugar, tapioca flour, and lemon juice and stir gently to combine thoroughly.

To make the topping, in a small saucepan, melt half of the butter with the vanilla bean over medium heat for 8 to 10 minutes, or until the butter is browned and has a nutty aroma.  Remove and discard the vanilla bean and set the butter aside to cool.

In a second small saucepan, heat the remaining butter over low heat just until melted, then set aside to cool.

While the butters are cooling, in a bowl, stir together the flour, cornmeal, almonds, both sugars, cinnamon, and nutmeg.

When the butters have cooled, drizzle both of them over the flour mixture, then toss lightly with a wooden spoon, being careful not to overmix.  You want to have small clumps.

Distribute the peach and blueberry mixture evenly on the bottom of the baking dish.  Spoon the topping evenly over the top.  Bake for 35 to 45 minutes, or until the fruit is bubbling along the sides of the dish and the topping is browned.  Remove from the oven and let cool for about 10 minutes.

To serve, spoon the crisp onto individual plates and top with ice cream.

Makes 8 to 10 servings

Sunday, July 01, 2012

Cooking My Way Back Home: Creamy Stone-Ground Grits with Vermont Cheddar


There have been a couple of cookbooks that I've had my eye on for a while, and Cooking My Way Back Home is certainly one of them.  A quick flip through in the bookstore was all it took to sell me on the darn thing.  Heck, just the picture of the meatballs in the green peppercorn sauce was enough to sell me on the book.  Luckily I was able to get a copy through my cookbook testing.

Cheese grits are something very homey and comforting and incredibly Southern.  Everyone makes them, everyone except for me.  I'm still searching for my cheese grit nirvana.  Will these be it?  I certainly liked the look of the long cooking time with lots of milk.  That certainly signaled creamy to me.  I must admit that I did not go to the trouble of ordering Anson Mills grits.  Sorry, but Quaker has to cut it.  I'm tired and low on funds for the moment.

Since I have an aversion to using a double boiler unless absolutely necessary, I had to keep a close eye on these babies to make sure the bottom of the pot didn't scorch, but with the heat set on the lowest setting, I managed okay.  I certainly loved the little browned bits on the top after a run under the broiler.  But the cheese flavor was...underwhelming.  I want bold cheese flavor, not meek cheese hiding in the creaminess.  I would use around double the cheese next time.  I've kept the original amount in the recipe below, so be warned.

Creamy Stone-Ground Grits with Vermont Cheddar
From Cooking My Way Back Home by Mitchell Rosenthal

4 cups whole milk
4 cups water
2 cups stone-ground grits
1 cup grated sharp Vermont Cheddar or other sharp Cheddar cheese
¾ teaspoon salt
Fresh ground pepper

In a heavy-bottomed pan, combine the milk and water and bring to a simmer over medium heat.  Slowly add the grits in a steady stream while whisking constantly.  Continue whisking for about 8 minutes, or until the grits thicken.

Meanwhile, pour water into the bottom of a double boiler, place over medium-low heat, and bring to a simmer.  When the grits are ready, transfer them to the top of the double boiler and place over (not touching) the simmering water.  Cook, stirring occasionally, for about 35 minutes, or until creamy.

Add all but 1 tablespoon of the cheese, the salt, and a few grinds of pepper and stir until the cheese melts and is well combined.  Just before the grits are ready, preheat the broiler.

Transfer the cheese grits to a flameproof gratin dish and sprinkle the reserved 1 tablespoon of cheese evenly over the top.  Broil until bubbly, then serve at once.

Serves 6