Sunday, May 31, 2009

Kaffeehaus: Apfelstrudel (Apple Strudel)


One of the best parts of a German meal is the dessert.  Germans really know their sugary sweets.  While I normally go for something chocolate, occasionally I feel the need to try something with a pile of freshly whipped cream.  And that thing is normally some type of strudel.

You've probably seen several different fillings, but I decided to make a sweet strudel, with apples and walnuts in the filling. I left out the raisins since I think they're nasty, but you can certainly add them back in.  When I pulled this goodie out of the oven, I almost couldn't believe I'd made the thing.  Like an apple pie, but self-contained, tender, flaky, and scrumptious.

Apfelstrudel (Apple Strudel)
From Kaffeehaus: Exquisite Desserts from the Classic Cafés of Vienna, Budapest, and Prague by Rick Rodgers

2 tablespoons golden rum (or use apple juice)
3 tablespoons raisins
¼ teaspoon ground cinnamon
⅓ cup plus 1 tablespoon granulated sugar
½ cup (1 stick) unsalted butter, melted, divided
1½ cups fresh plain bread crumbs
Strudel Dough
½ cup coarsely chopped walnuts
2 pounds tart baking apples, peeled, cored and cut into ¼-inch-thick slices

Mix the rum and raisins in a bowl. Mix the cinnamon and sugar in another bowl. Heat 3 tablespoons of the butter in a large skillet over medium-high. Add the breadcrumbs and cook whilst stirring until golden and toasted. This will take about 3 minutes. Let it cool completely.

Put the rack in the upper third of the oven and preheat the oven to 400°F. Line a large baking sheet with baking paper (parchment paper). Make the strudel dough as described below. Spread about 3 tablespoons of the remaining melted butter over the dough using your hands (a bristle brush could tear the dough, you could use a special feather pastry brush instead of your hands). Sprinkle the buttered dough with the bread crumbs.

Spread the walnuts about 3 inches from the short edge of the dough in a 6-inch wide strip. Mix the apples with the raisins (including the rum), and the cinnamon sugar. Spread the mixture over the walnuts.

Fold the short end of the dough onto the filling.  Lift the tablecloth at the short end of the dough so that the strudel rolls onto itself.  Transfer the strudel to the prepared baking sheet by lifting it.  Curve it into a horseshoe to fit.  Tuck the ends under the strudel.  Brush the top with the remaining butter.

Bake the strudel for about 30 minutes or until it is a deep golden brown.  Cool for at least 30 minutes before slicing.  Use a serrated knife and serve either warm or at room temperature. It is best on the day it is baked.

Strudel Dough
1⅓ cups unbleached all-purpose flour
⅛ teaspoon sea salt
7 tablespoons water, plus more if needed
2 tablespoons vegetable oil, plus additional for coating the dough
½ teaspoon apple cider vinegar

Combine the flour and salt in a stand-mixer fitted with the paddle attachment. Mix the water, oil and vinegar in a measuring cup. Add the water/oil mixture to the flour with the mixer on low speed. You will get a soft dough. Make sure it is not too dry, add a little more water if necessary.

Take the dough out of the mixer. Change to the dough hook. Put the dough ball back in the mixer. Let the dough knead on medium until you get a soft dough ball with a somewhat rough surface.Take the dough out of the mixer and continue kneading by hand on an unfloured work surface. Knead for about 2 minutes. Pick up the dough and throw it down hard onto your working surface occasionally.Shape the dough into a ball and transfer it to a plate. Oil the top of the dough ball lightly. Cover the ball tightly with plastic wrap. Allow to stand for 30 to 90 minutes (longer is better).

It would be best if you have a work area that you can walk around on all sides like a 36-inch round table or a work surface of 23x38 inches. Cover your working area with table cloth, dust it with flour and rub it into the fabric. Put your dough ball in the middle and roll it out as much as you can.

Pick the dough up by holding it by an edge. This way the weight of the dough and gravity can help stretching it as it hangs. Using the back of your hands to gently stretch and pull the dough. You can use your forearms to support it.

The dough will become too large to hold. Put it on your work surface. Leave the thicker edge of the dough to hang over the edge of the table. Place your hands underneath the dough and stretch and pull the dough thinner using the backs of your hands. Stretch and pull the dough until it's about 2 feet wide and 3 feet long, it will be tissue-thin by this time.  Cut away the thick dough around the edges with scissors. The dough is now ready to be filled.

Thursday, May 28, 2009

Culinary in the Country: Peanut Butter and Nutella Brownies


I was in desperate need of sugar and chocolate this evening, so I pulled out my "to-bake-later" binder and ran through my options. I settled on brownies. Because when you need baked chocolate goodness, brownies are your fastest answer.  I originally ran across this recipe while viewing food porn on Foodgawker. Delicious, with subtle nutty flavors. And I couldn't resist using up my Ghirardelli chocolate chips, making them polka dot brownies.

Peanut Butter and Nutella Brownies
From Culinary in the Country blog

1 cup (2 sticks) unsalted butter
2 cups granulated sugar
2 teaspoons pure vanilla extract
4 large eggs, at room temperature
1 cup all-purpose flour
¾ cup good quality unsweetened cocoa powder
⅛ teaspoon sea salt
½ teaspoon baking powder
½ cup Nutella
½ cup smooth peanut butter

Preheat the oven to 350°F.  Prepare a 9x13-inch baking dish with cooking spray.

Melt the butter over very low heat; when melted remove from heat and gently pour into a large bowl. With a wooden spoon stir in the sugar and vanilla. Add the eggs, one at a time, beating well after each addition. Add flour, cocoa, baking powder and salt in a medium bowl and whisk together. Combine the flour mixture slowly to the butter, sugar, and egg mixture and mix well.

Mix the peanut butter and Nutella in a small microwave safe bowl, and heat until it reaches a runny consistency. Stir the mixture into the batter; then pour it into the baking dish.

Bake for 30 minutes or until a toothpick inserted in the center comes out clean.  Allow to cool completely before cutting.

Monday, May 25, 2009

Ball Complete Book of Home Preserving: Sweet Cherry Jam and Brandied Apricot Preserves

As part of my recent effort to not eat preservatives, strange chemicals, and things I can't spell or pronounce, I have started canning my own food. Even though it heats up my kitchen for hours and renders me a sweaty mess.  Since apricots and California cherries were on sale this week, they were the first things to make it into a jar.

The two recipes I made were the Sweet Cherry Jam (with all suggested additions, including amaretto liqueur) and the Brandied Apricot Preserves. And yes, I love liqueur in my food. I've got to admit, from what I tasted while filling my little jars, these recipes turn out some pretty fabulous jam and preserves. Next up, if I'm feeling ambitious, is possibly some Blueberry Butter? And no, that's not butter as in cow's milk.

Sweet Cherry Jam
From Ball Complete Book of Home Preserving

4 cups chopped pitted sweet cherries
4 tablespoons lemon juice
½ teaspoon ground cinnamon (optional)
½ teaspoon ground cloves (optional)
¼ cup amaretto liqueur (optional)
1 (1¾-ounces) package regular powdered fruit pectin
5 cups granulated sugar

Prepare canner, jars, and lids.

In a large, deep stainless steel saucepan, combine cherries, lemon juice, cinnamon, cloves, and amaretto liqueur, if using.  Whisk in pectin until dissolved.  Bring to a boil over high heat, stirring frequently.  Add sugar all at once and return to a full rolling boil, stirring constantly.  Boil hard, stirring constantly, for 1 minute.  Remove from heat and skim off foam.

Ladle hot jam into hot jars, leaving ¼-inch headspace.  Remove air bubbles and adjust headspace, if necessary, by adding hot jam.  Wipe rim.  Center lid on jar.  Screw band down until resistance is met, then increase to fingertip-tight.

Place jars in canner, ensuring they are completely covered with water.  Bring to a boil and process for 10 minutes.  Remove canner lid.  Wait 5 minutes, then remove jars, cool and store.

Makes about 6 8-ounce jars

Brandied Apricot Preserves
From Ball Complete Book of Home Preserving

5 cups sliced pitted fresh apricots
2 cups chopped cored peeled tart apples
2 cups granulated sugar
½ cup liquid honey
2 tablespoons lemon juice
1 cup brandy

In a large stainless steel saucepan, combine apricots, apples, sugar, honey, and lemon juice.  Stir to mix well.  Cover and let stand at room temperature for 40 minutes.

Meanwhile, prepare canner, jars, and lids.

Bring reserved apricot mixture to a boil over medium heat, stirring to dissolve sugar.  Reduce heat and boil gently, stirring frequently, until mixture thickens, about 25 minutes.  Remove heat and test gel.  If gel stage has been reached, skim off foam.  Stir in brandy and return to medium heat.  Boil gently, stirring constantly, for 5 minutes.  Remove from heat and skim off foam.

Ladle hot jam into hot jars, leaving ¼-inch headspace.  Remove air bubbles and adjust headspace, if necessary, by adding hot preserves.  Wipe rim.  Center lid on jar.  Screw band down until resistance is met, then increase to fingertip-tight.

Place jars in canner, ensuring they are completely covered with water.  Bring to a boil and process for 10 minutes.  Remove canner lid.  Wait 5 minutes, then remove jars, cool and store.

Makes about 6 8-ounce jars

Saturday, May 23, 2009

Cathal Armstrong: Ravioli with Ramps, Mushrooms, and Shaved Parmesan


I'm trying to find as many things to do with ramps as possible before the season ends.  I love the darn things.  I've seriously considered going out into the woods and looking for my own little patch.  Knowing my luck though, I'd probably only find my own little patch of poison ivy.  Guess I'll stick to the store.

Ravioli with Ramps, Mushrooms, and Shaved Parmesan
Adapted from Cathal Armstrong, Restaurant Eve in Alexandria, VA

1 (1-pound) package cheese or mushroom ravioli
1 teaspoon chopped garlic
2 tablespoons extra-virgin olive oil
4 thinly sliced ramp stalks
8 ounces crimini mushrooms, washed
1 (14½-ounce) can diced tomatoes, drained
Pinch red pepper flakes
2 tablespoons chicken broth
2 tablespoons unsalted butter
½ teaspoon chopped fresh thyme
Sea salt, to taste
3 tablespoons shaved Parmesan cheese

Bring a large saucepan of salted water to a boil. Cook the ravioli according to package directions. Drain well and set aside.

Meanwhile, in a medium saucepan over medium, sauté the garlic in the olive oil for about 2 minutes. Add the ramps, mushrooms, tomatoes, and red pepper flakes, then sauté for another 5 minutes, or until the mushrooms are tender.

Add the chicken broth. As soon as it bubbles, stir in the butter. Add the ravioli and toss to heat through. Add the thyme and salt, then divide between 4 serving bowls. Garnish with shaved Parmesan.

Makes 4 servings

Tuesday, May 19, 2009

The Zuni Café Cookbook: Ricotta Gnocchi

So when I saw the first challenge for the new Daring Cooks group, I couldn't help but groan. What is it with people and Italian food? Can we please cook something else? I hate Italian food. But like a good little daring foodie, I marched right out to the grocery store to round up some ricotta cheese. Unfortunately a trip to the farmer's market was not in my immediate future, so I had to make do with some Sargento ricotta. But I splurged and got full fat! That helps make up for the fact it was sitting on the shelf for at least a week before I bought it, right?

I had a frying pan full of tender turkey Italian sausage and sauteed shitake mushrooms in browned butter waiting for the gnocchi when they made it out of the cooking pot. I slapped them into the frying pan before they could disintegrate on me, only to find that despite a heavy hand with the butter, they insisted on sticking to the bottom of the frying pan. Boy, was I irked. I managed to scrape some off the pan and into a bowl for a nice beauty shot before trying some of my creation.

These things stopped me cold. What was in my mouth was very unpleasant. They were light and fluffy, but also slimy and strange. And immediately the perfect description came to me. It was like eating boogers. Nasty. Never again. My ricotta is staying in lasagna where it belongs.

Ricotta Gnocchi
From The Zuni Café Cookbook by Judy Rodgers

1 pound fresh ricotta (2 cups)
2 large cold eggs, lightly beaten
1 tablespoon unsalted butter
2 or 3 fresh sage leaves, chopped, or a few pinches of freshly grated nutmeg, or a few pinches freshly chopped lemon zest (all optional)
½ ounce Parmigiano-Reggiano, grated (about ¼ cup very lightly packed)
About ¼ teaspoon salt (a little more if using kosher salt)
All-purpose flour, for forming the gnocchi

To sauce the gnocchi:
8 tablespoons unsalted butter, sliced
2 teaspoons water

Testing the cheese (the day before you make the gnocchi):
Check the cheese for wetness. If you are lucky enough to have an individual basket-drained ricotta—you'll see the basket imprint or dimples on the cheese—it may be sitting in a little whey; in this case, slide it out of the container and wick away the surface moisture with a dry towel. With any ricotta, place about 2 teaspoons of the cheese on a dry paper towel and wait for about 1 minute. There will always be a little wet spot under and around the cheese, but if the cheese has thrown a wide ring of moisture, it is too wet to use as is. Place it in a strainer, or double-wrap in cheesecloth, and suspend over a deeper receptacle to drain for 8 to 24 hours, refrigerated. Cheesecloth is more efficient, as it also wicks moisture from the cheese while gravity does its job of draining. You can also speed up the draining operation by cinching the cheesecloth tight and squeezing some of the moisture from the ball of cheese.

Making the batter:
Beat the ricotta vigorously, then smash a little cheese against the side of the bowl with a soft rubber spatula. If you can still make out firm curds, press the cheese through a strainer to break them up. Stir in the eggs. Melt the 1 tablespoon of butter—with the chopped sage, if using—and add to the batter. Add the nutmeg or lemon zest, if using. Add the Parmigiano and salt and beat the whole mixture very well. This is what makes the gnocchi light. You should have a soft, fluffy batter.

Forming and testing a sample gnocchi:
Make a bed of flour about ½-inch deep in a shallow baking dish or on a sheet pan.

Scrape the sides of the bowl, mass the batter, and smooth its surface. Use a spoon held at an angle to shallow-scoop out 2 to 3 teaspoons of batter. Use your fingertip to push the almond-shaped scoop of batter cleanly from the bowl of the spoon onto the bed of flour. Shimmy the pan gently to coat the sides, then flip the gnocchi with your fingertip to coat the top. Lift from the flour and cradle and rock it in your palm. Don't squeeze it. You should have a dusty oval pod. As long as the general shape is uniform and rotund, don't worry that the gnocchi has a few wrinkles, dimples, and bumps.

To check the batter, poach this first gnocchi in a small pot of simmering well-salted water. It will initially sink, but will then swell, roll, and bob to the surface. Maintaining the quiet simmer, cook until the gnocchi is just firm, usually 3 to 5 minutes from the time it floats, depending on the cheese and the size of the gnocchi. Don't boil hard, or the gnocchi may explode. If, even at a gentle simmer, the gnocchi spreads or starts to decompose, the cheese was probably too wet. This can usually be corrected by beating a teaspoon or so of egg white into the remaining batter. If the batter was very fluffy, but the sample seems heavy, beat in about 1 teaspoon beaten egg. In either case, poach another sample to make sure the fix is successful.

Taste the sample for salt, and adjust the batter if needed.

Forming the remaining gnocchi:
Use the same spoon-and-finger technique to form the rest of the gnocchi. I usually form them in groups of 4 to 6, placing them all at the same angle, and a few inches apart, in the bed of flour, then shimmy the pan to coat all of them at once; don't leave them sitting too long in the flour, or they will absorb too much. Keep scraping the bowl and smoothing the surface of the batter to permit smooth scoops. As with the sample, roll each gnocchi in your hand. Arrange them on a sheet pan lined with a flour-dusted sheet of parchment paper or wax paper. Be sure that the individual gnocchi are not touching one another.

You can poach the gnocchi right away, but if you refrigerate them uncovered for about an hour, they will firm up, making them easier to cook and handle. (They will keep for up to 8 hours that way.)

Cooking the gnocchi:
Place the 8 tablespoons of butter and the 2 teaspoons of water in a 12-inch skillet; set aside.

Bring 2 to 3 quarts water to a simmer in a wide pan, 10 or more inches in diameter, so the gnocchi won't crush each other too much as they push to the surface. A sauté pan, flared brasier, or saucier pan will work, as long as it is at least 2 inches deep. Salt the water liberally—about 1 teaspoon per quart. Add the gnocchi one by one, adjusting the heat to maintain the simmer. Dip your fingertips in water if you find they are sticking to the gnocchi, but don't fret if the gnocchi stick a little to the paper. Do avoid holding the tray of gnocchi in the steam. Cook the gnocchi as you did the sample, until just firm, 3 to 5 minutes from the time they float.

Meanwhile, as soon as the gnocchi float to the surface, place the pan of butter and water over medium heat. Swirl the pan as the butter melts and begins to seethe. As soon as the butter is completely melted and has turned into an opaque pale yellow sauce, turn off the heat. Swirl the pan a few more times.

Lift the gnocchi out with a slotted spoon or skimmer, slide into the ready skillet, and roll in the warm butter sauce. Serve instantly in warm bowls.

Makes 4 to 6 servings

Monday, May 18, 2009

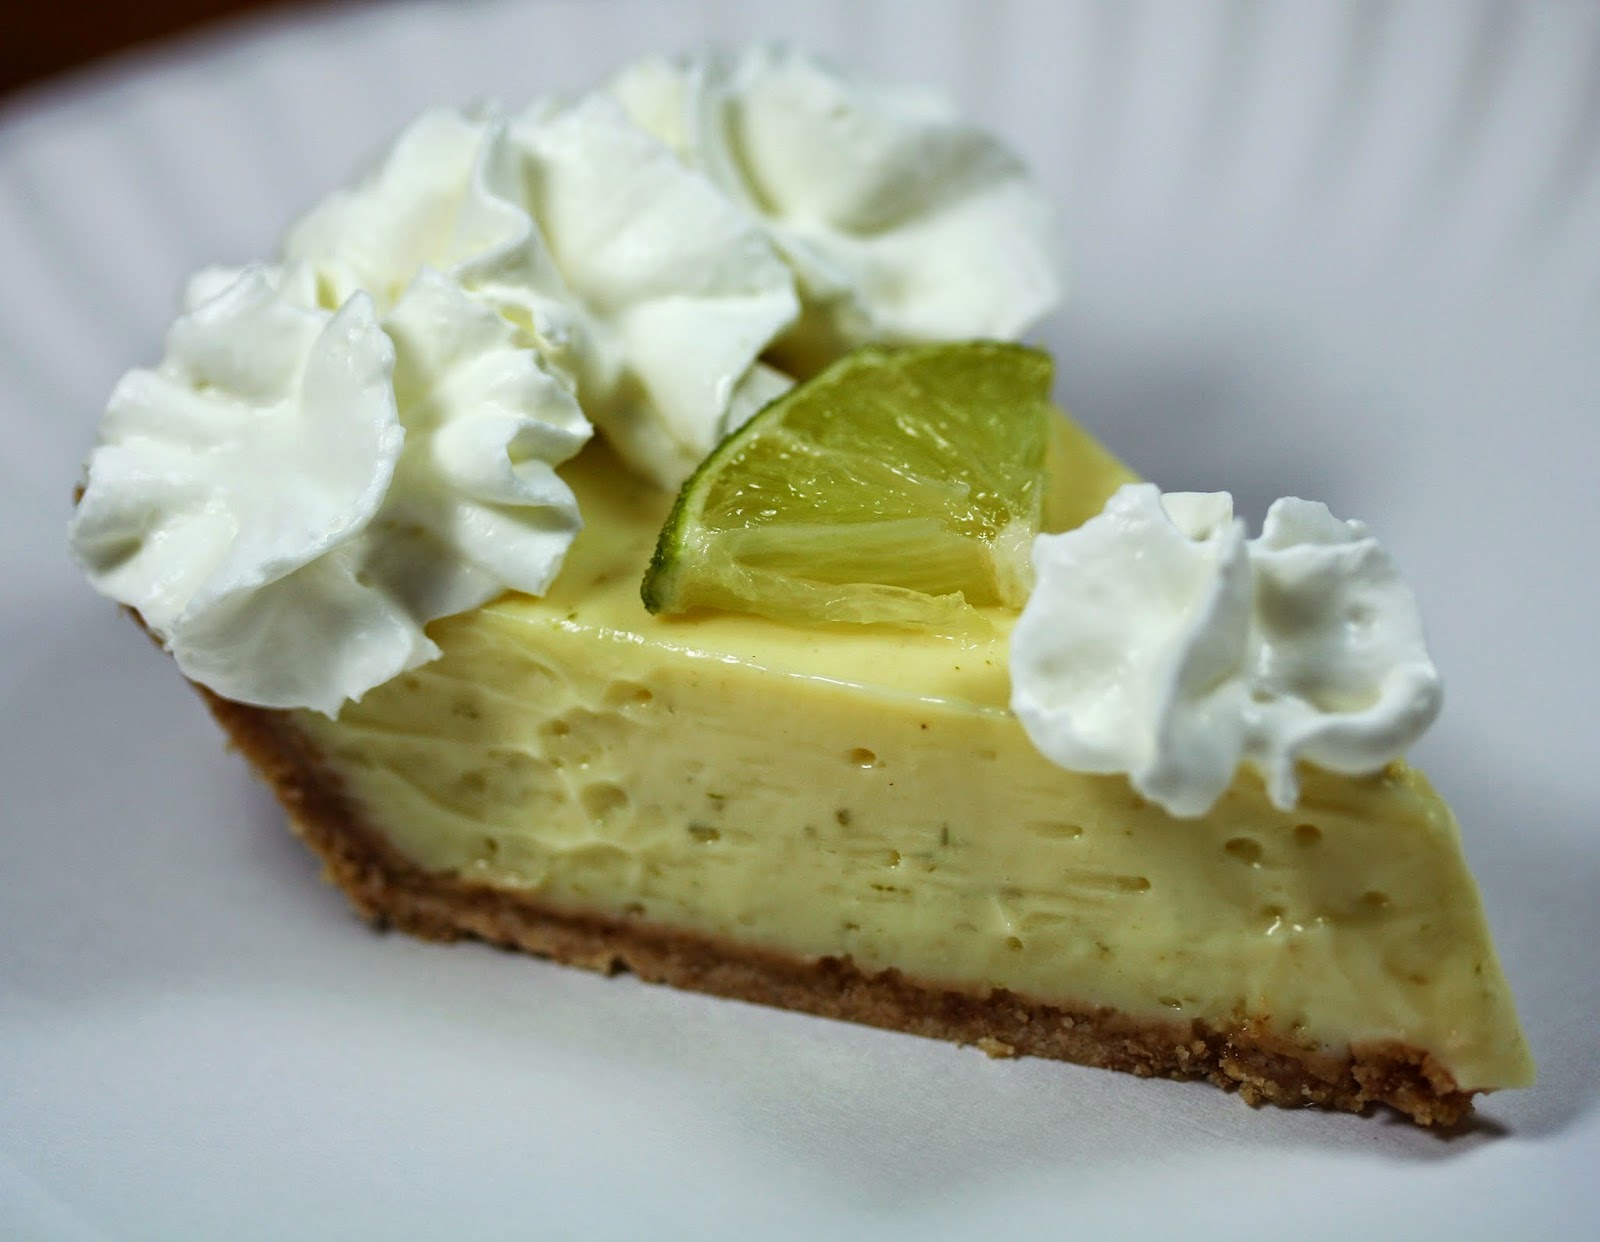
Joe's Stone Crab: Key Lime Pie


Pretty sad, but only a couple weeks after returning from Florida, I'm already wishing I hadn't come back. I really need the everyday sunshine to re-charge my batteries. And all the fabulous seafood and citrus isn't bad either.  Luckily for me, I brought back a bottle of key lime juice so I could make a nice little pie.

I cheated and ate some the same night. It was little soft, so I forced myself to wait until tonight to try another piece. The pie had weeped overnight, but I was able to clean it up and cut off the soggy portions, and it was much better. There was a small portion at the very center that was still a little soft, so I'm not sure if I'm a believer in the only-cook-it-for-10-minutes-or-you'll-ruin-it line. Next time I'll probably do 12.  Other than the weeping-filling-thing, the pie was delicious, nice and tart and refreshing. I highly recommend it.

Key Lime Pie
From Joe's Stone Crab restaurant in Miami, FL

Crust:
1 cup plus 2½ tablespoons graham cracker crumbs
5 tablespoons melted unsalted butter
⅓ cup granulated sugar

Filling:
3 large egg yolks
1½ teaspoons grated lime zest
1 (14-ounce) can sweetened condensed milk
⅔ cup freshly squeezed lime juice

Topping:
1 cup heavy or whipped cream, chilled
1 tablespoon powdered sugar

For the graham cracker crust:
Preheat the oven to 350°F. Butter a 9-inch pie pan. In a food processor, combine the graham cracker crumbs with the melted butter and sugar and pulse or stir until combined. Press the mixture into the bottom and sides of the pie pan, forming a neat border around the edge. Bake the crust until set and golden, 8 minutes. Set aside on a wire rack; leave the oven on.

For the filing:
Meanwhile, in an electric mixer with the wire whisk attachment, beat the egg yolks and lime zest at high speed until very fluffy, about 5 minutes. Gradually add the condensed milk and continue to beat until thick, 3 or 4 minutes longer. Lower the mixer speed and slowly add the lime juice, mixing just until combined, no longer. Pour the mixture into the crust. Bake for 10 minutes or until the filling has just set. Cool on a wire rack, then refrigerate. Freeze for 15 to 20 minutes before serving.

For the topping:
Whip the cream and the powdered sugar until nearly stiff. Cut the pie in wedges and serve very cold, topping each wedge with a large dollop of whipped cream.

Saturday, May 16, 2009

A Good Appetite: Creamy Sausage and Ramp Pasta

I never figured that moving to another state would mean also coming upon new foods.  I mean, I've been cooking for a while now.  How did I not hear about ramps??  Especially as delicious as they are.  They're like the perfect onion/leek/spring onion.  I think their season is so short just to torture me.

I'm not normally a pasta lover, but the ramps and cream and sausage in this dish just kinda work.  It's one of those lick-your-bowl-clean things.  But now I have to figure out how to get ramps if I move back to Texas...

Creamy Sausage and Ramp Pasta
Adapted from A Good Appetite blog

6 ounces fresh linguine
½ tablespoon olive oil
½ pound Italian sausage
10 ramps
 cup half-and-half
¼ cup grated Parmesan cheese
Sea salt and freshly ground black pepper

Cook pasta according to directions on box.  When cooked, drain and set aside.

Meanwhile, heat the olive oil in a large skillet over medium-high heat.  Add the sausage and cook through.  Slice the ramps; bulbs, stems, and leaves, keeping the leaves separate from the bulbs and stems.  Add the bulbs and stems to the skillet and sauté for 2 to 3 minutes until slightly softened.  Add the half-and-half and cheese.  Bring to a simmer and stir for 1 minute.  Add the cooked pasta and ramp leaves.  Stir until the ramp leaves wilt slightly and everything is heated through.  Season with salt and pepper.

Makes 2 servings

Tuesday, May 12, 2009

Bon Appétit: Lemon and Blueberry Upside-Down Cake


This week my grocery store had a special on pints of blueberries. They looked pretty fresh, so I bought a package. It was only after I returned home that I realized I had no idea what to make them into, except that I didn't want the standard muffin.  And if you don't want a muffin, what do you do?  Make a cake.  The cake turns out deliciously moist and not too sweet, with the blueberries adding most of the sugar. It's delicious hot, with whipped cream, cold, or any other way you can think of to eat it..

Lemon and Blueberry Upside-Down Cake

¾ cup packed light brown sugar
1 cup (2 sticks) unsalted butter, divided use
1½ cups blueberries
¾ cup cake flour
¼ teaspoon baking powder
¼ teaspoon sea salt
4 ounces almond paste
½ cup granulated sugar
2 tablespoons finely grated lemon peel
1 tablespoon lemon juice, fresh squeezed
3 large eggs, at room temperature

Preheat oven to 350°F.

In a small saucepan, heat brown sugar and 1 stick of unsalted butter until butter melts and the sugar is incorporated. When mixture bubbles, pour into the bottom of a 9-inch round cake pan. Drop blueberries evenly over the top and press into the sugar mixture slightly.

Sift together cake flour, baking powder, and salt. Set aside.

In the bowl of a stand mixer, use a fork to break up the almond paste. Add the sugar, lemon peel, and lemon juice. Using the paddle attachment, mix on medium speed until almond paste is mostly broken down, and the mixture resembles crumbs. Add the remaining 1 stick of butter, 1 tablespoon at a time, still beating. When mixture is creamy and fully combined, add eggs, one at a time. Use a spatula to scrape the sides of the bowl and ensure everything is combined.

Add flour mixture, and mix until just combined. Use the spatula to scrape the sides again and ensure the batter is uniform. Scoop the batter over the blueberry mixture in the pan, and then even off the top of the batter. Put the cake pan on a baking sheet, and bake for 35 to 45 minutes, or until golden brown and a toothpick inserted in the center comes out clean.

Let the cake rest for approximately a minute before inverting onto a large plate. Wait 15-20 minutes before serving.

Thursday, May 07, 2009

The Best Casserole Cookbook Ever: Easy Tilapia Casserole


After all of the other casseroles I made from this cookbook that turned out in varying degrees of blah and boring, I'm not sure why I decided to give it one more shot.  Maybe I'm just a bad casserole recipe picker.  Maybe casseroles from the Midwest are supposed to be blah and boring.  Maybe my Texas tongue is betraying me.  Maybe this casserole needs some color and flavor, stat.  I recommend spinach.  Just 'cuz.

Easy Tilapia Casserole
From The Best Casserole Cookbook Ever by Beatrice Ojakangas

2 tablespoons unsalted butter, melted, plus extra for the dish
1 pound tilapia fillets
Sea salt and freshly ground black pepper
1 (1-pound) package potato gnocchi
2 dashes Tabasco sauce
1⅓ cups heavy cream, or 1 (10¾-ounce) can cream of shrimp soup
¼ cup grated Parmesan cheese
¼ cup panko or fine dry breadcrumbs

Preheat the oven to 350°F.

Rinse the tilapia and pat dry.  Sprinkle with salt and pepper.

Spread the gnocchi in an even layer in the casserole.  Add the Tabasco to the cream or soup and drizzle half over the gnocchi.  Top with the fish fillets in one layer, overlapping if necessary.  Spread the remaining cream over the fish.  Mix the Parmesan, panko, and 2 tablespoons melted butter in a small dish and sprinkle over the fish evenly.

Bake, uncovered, for 30 to 35 minutes, until the casserole is bubbly and the fish flakes.

Makes 4 servings

Tuesday, May 05, 2009

Emeril Lagasse: White Chocolate Macadamia Nut Blondies


I've tried many different recipes for blondies, but they never seem to live up to my perfect ideal: soft, chewy, and sweet, with a flaky top. Basically a vanilla brownie. Because isn't that what a blondie is supposed to be? And I never mind the addition of white chocolate and macadamia nuts.  This recipe appears to be what I was looking for, but I will admit that trying to stir 3 cups of flour into a resistant batter by hand was NOT FUN.

White Chocolate Macadamia Nut Blondies
From Emeril Lagasse

1 cup (2 sticks) plus 1 teaspoon unsalted butter, at room temperature
1½ cups packed light brown sugar
2 large eggs
1 tablespoon pure vanilla extract
3 cups plus 1 tablespoon all-purpose flour
1 teaspoon baking powder
2 cups white chocolate chips
1 cup macadamia nuts, toasted and roughly chopped

Preheat oven to 350°F.

In the bowl of an electric mixer fitted with the paddle attachment, cream 2 sticks of butter and sugar on medium speed until light and fluffy. While machine is running, add eggs and vanilla and mix until incorporated.

Sift together 3 cups flour and baking powder. Slowly add flour mixture to batter and mix on low speed just until a dough is formed. Very gently, by turning the mixer on and then off, fold chips and nuts into dough.

Once dough is blended, grease a 9x9-inch baking pan with remaining 1 teaspoon butter and dust with 1 tablespoon flour. Pour batter into pan and place in preheated oven. Bake for 25 to 30 minutes, or until set yet still moist.

Set aside to cool completely before cutting into squares.