Sunday, August 27, 2006

Suraya Karjeker: Murgh Shahi Korma (Chicken Shahi Korma)


I've always been a bit fascinated by Indian food.  The spices, the thick yogurt, produce I've never seen before.  But it's one of those things that seems easier to just get in your local restaurant than try to attempt at home.  Fortunately, I was able to take a cooking class on Indian food, so I have a small repertoire now that can be made on my stovetop.

Probably my favorite Indian dish is something called shahi korma.  It's basically a meat cooked in a spiced nutty creamy sauce.  There is something to satisfying about it.  It takes a while to cook, but it is well worth it. The shahi korma can also be made with lamb or beef stew meat, but if using beef, it needs twice as long to simmer.

Murgh Shahi Korma (Chicken Shahi Korma)
From Suraya Karjeker, cooking class at Central Market

4 cloves garlic
1 (1-inch) knob fresh ginger, peeled
1 ounce blanched, slivered almonds
3 tablespoons water
1 pound boneless, skinless chicken thighs, cubed
5 green cardamom pods
3 whole cloves
1 (3-inch) cinnamon stick
1 small white onion, sliced into rings
1 teaspoon ground coriander
2 teaspoons ground cumin
½ teaspoon Kashmiri chili powder
1 teaspoon sea salt
5 fluid ounces whipping cream
¼ teaspoon garam masala
1 teaspoon saffron threads

Put the garlic, ginger, almonds, and water into a small food processor and blend until the ingredients form a paste. Set aside.

Add some oil to a large skillet and when hot, add chicken cubes. Cooking in batches, brown on all sides and then place in a bowl to rest. Add cardamom, cloves, and cinnamon to remaining oil in pan and stir for about 10 seconds. Then add onions and brown. Turn the heat to medium and add the paste from the food processor. Add the ground coriander, cumin, and chili powder. Stir and cook the mixture for three minutes; add the cooked chicken along with any accumulated juices. Add about a cup of water and bring the mixture to a simmer. Cover and cook for one hour, checking mixture, stirring, and adding water as necessary. When the hour is almost up, don't add any more water and allow mixture to thicken slightly. Pick out the cardamom pods, cloves, and cinnamon stick; discard. Add the salt, cream, garam masala, and saffron. Mix well.

Makes 4 servings

Monday, August 21, 2006

Fiery-Foods: Calabacitas (Creamy Corn and Zucchini)


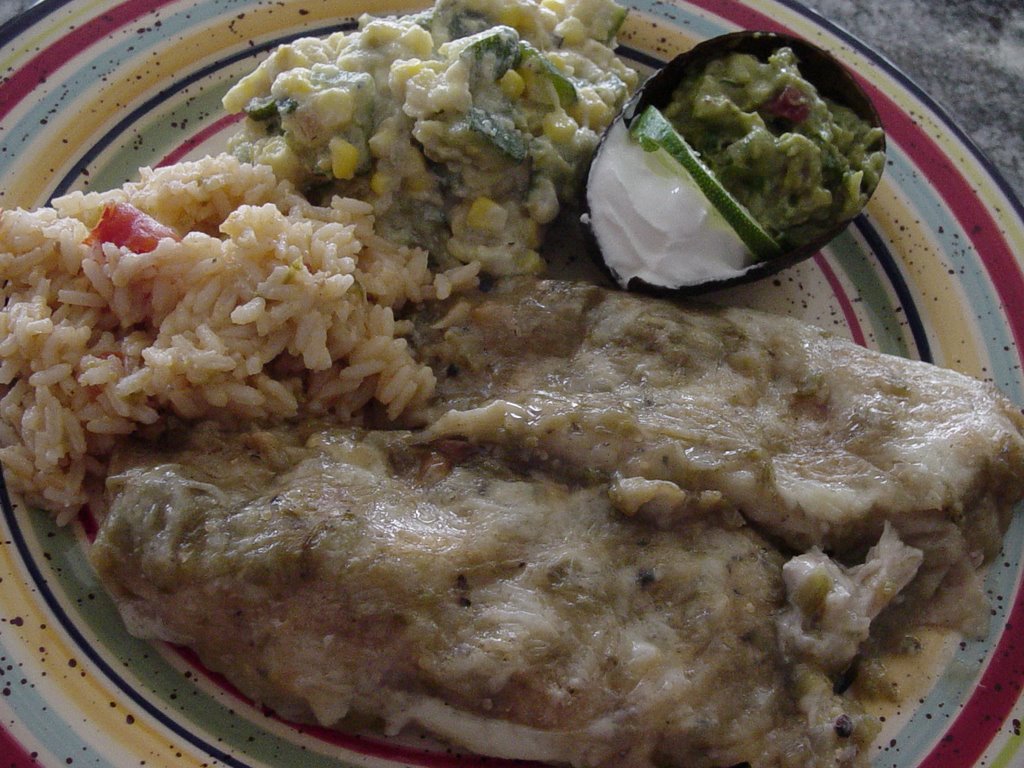
When I made my awesome chicken enchiladas, I knew I also wanted a little something to go on the side.  And it wouldn't hurt if it also highlighted the beauty that is Hatch green chiles.  Luckily I found this zucchini and corn dish that turns out a delicious creamy, cheesy side that works wonders next to some magnificent enchiladas.


Calabacitas (Creamy Corn and Zucchini)
Adapted from fiery-foods.com

3 small zucchini squash, sliced into half-moon shapes
½ cup yellow onion, chopped
2 tablespoons unsalted butter
½ cup roasted Hatch chiles, peeled and chopped
2 cups cooked whole kernel corn
1 cup heavy cream
¼ cup shredded Monterey Jack cheese
Chopped cilantro, for garnish

Sauté the zucchini and onion in the butter over medium-high heat until the onion is translucent, about 7 minutes. Add the chile, corn, and cream and reduce the heat to medium. Simmer the mixture for 15 to 20 minutes to thicken the sauce. Add the cheese and stir through until it melts.  Garnish with cilantro, if desired.

Makes 6 servings

Sunday, August 20, 2006

Fiery-Foods: Hatch Green Chile Chicken Enchiladas


Every year there's a shipment of green chiles that come from Hatch, New Mexico. They get roasted in giant roasters and sold in bulk. And then everyone makes delicious recipes in celebration. I wanted to participate at home this year since Tex-Mex cooking has become so close to my heart, so I made a green chile dinner in honor of the yearly chile festival.  I decided on some green chile chicken enchiladas because who doesn't like enchiladas? The chiles are perfectly matched with the delicate chicken, and these enchiladas were a hit.

Note: If you would like the enchiladas a little spicy, either choose spicy Hatch peppers or add some finely chopped jalapeño to the sauce.

Green Chile Chicken Enchiladas

3 cups shredded rotisserie chicken
1 (10½-ounce) can cream of mushroom soup
2 roasted Hatch green chiles, peeled and chopped
12 (6-inch) corn tortillas
Vegetable oil
Hatch Green Chile Sauce
2 cups shredded Monterey Jack, pepper jack, or Chihuahua cheese

Spray a 13x9-inch glass baking dish with cooking spray and set aside. Preheat oven to 350°F.

In a large bowl, mix chicken, cream of mushroom soup, chiles, and ½ cup of the shredded cheese. Set aside. Heat oil in a skillet over medium heat. Add tortillas, one at a time, and cook briefly on both sides (about five to ten seconds) until soft. Immediately remove the tortilla to the prepared dish. Spoon chicken mixture down the center of the tortilla and fold both sides over to form a tube. Make sure the seam is on the bottom before moving to the next tortilla. Repeat steps of cooking and stuffing tortillas until all tortillas are in the large dish.

Pour green chile sauce evenly over the enchiladas. Sprinkle cheese over the top. Place in hot oven and cook for approximately 20 to 30 minutes, or until bubbly and cheese is melted.

Hatch Green Chile Sauce
Adapted from fiery-foods.com

3 tablespoons unsalted butter
½ cup white onion, finely chopped
4 small tomatillos, husks removed, chopped
2 cloves garlic, minced
2 tablespoons all-purpose flour
2 cups chicken broth
1 cup roasted Hatch chiles, peeled and chopped
½ teaspoon ground cumin
½ teaspoon dried Mexican oregano
Sea salt and freshly ground black pepper
1 bunch fresh cilantro, leaves only
½ cup heavy cream

Heat a skillet over medium heat, and add the butter when hot. Add the onion and tomatillos and sauté until soft, about five minutes. Add the garlic and sauté for an additional 30 seconds.  Stir in the flour and blend well. Simmer for a couple of minutes to cook the flour, but make sure that it doesn't brown. Slowly add the broth, while stirring, until smooth. Add the Hatch chiles, cumin, and oregano and bring to a boil. Reduce the heat and simmer until the sauce has thickened slightly, about fifteen minutes. Add salt and pepper to taste.  Remove from the heat, add the cilantro, and blend the mixture using a stick blender until smooth.  Add the heavy cream, then return the sauce to the burner and heat until bubbling.

Sunday, August 13, 2006

Freddie's Online Puerto Rican Cookbook: Arroz Coqui Coqui (Frog Rice)


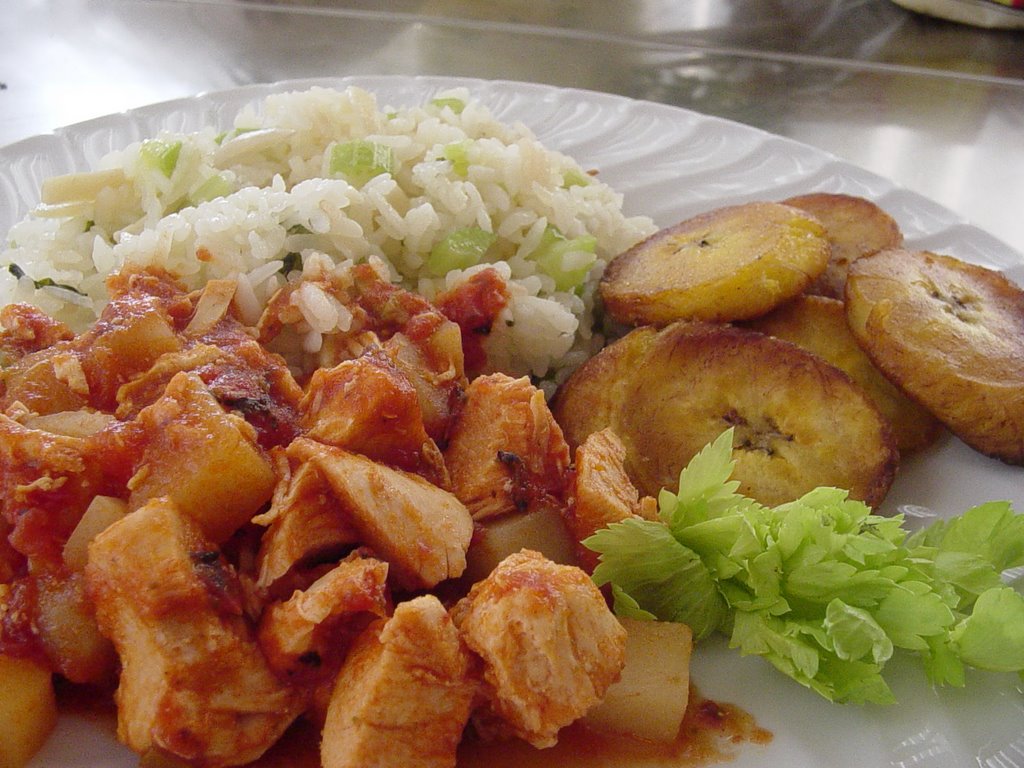
When I made my chicken stew last night, I needed something on the side to soak up all the delicious tomato sauce. I decided on a cilantro rice. This green rice really fascinates me. Its Spanish name is Arroz Coqui Coqui, and it appears it was named after a little brown and green frog native to Puerto Rico called the Coqui. So cute! Even though my dad tends to be a little suspicious of food that's a color other than what he expects, it went over well!

Arroz Coqui Coqui (Coqui Coqui Rice)
Adapted from Freddie's Online Puerto Rican Cookbook

¼ cup (½ stick) unsalted butter
1½ cups short- or medium-grain rice
2 ribs celery, finely chopped
¼ cup blanched, slivered almonds
3 cups chicken broth
2 bunches cilantro, leaves only, finely chopped
½ teaspoon sea salt

Wash the rice to remove the excess starch and drain until dry. In a large pot over medium high heat, melt butter. Add rice, celery, and almonds and stir often until the rice starts to turn golden brown. Add the rest of the ingredients; turn the heat down to medium and cover. Cook until all the liquid is absorbed and the rice is soft, stirring occasionally.

Makes 6 servings

Saturday, August 12, 2006

World Cuisine Recipes: Pollo Guisado (Chicken Stew)


Since it's super hot outside, and also super hot inside my apartment, I decided that I needed a vacation. Preferably a cruise to the Caribbean. But since I don't have any money, I decided to just cook a meal that made me feel like I was in the Caribbean. I decided to go with Puerto Rican cuisine since I haven't had much exposure to it.

After looking at a lot of recipes on the internet for various Puerto Rican specialties, I decided to avoid the traditional arroz con pollo (chicken and rice) and pork recipes. What I came up with was a chicken stew. This chicken dish requires a special ingredient called sofrito. Sofrito is a mixture of green pepper, onion, cilantro, garlic, and an herb called recao. I had quite a time trying to locate some recao since it's also called culantro, long coriander, ngo-gai, Mexican coriander, and saw tooth. In the end I finally found it at a Thai grocery (after the produce guys at Fiesta looked at me like I was crazy). I'm not sure if sofrito is available pre-made, but I made my own batch since it can easily be frozen.

Pollo Guisado (Chicken Stew)
Adapted from World Cuisine Recipes

1½ pounds boneless, skinless chicken thighs, cut into bite-sized chunks
1 teaspoon Goya Adobo seasoning
1 to 2 tablespoons canola oil
3 tablespoons sofrito (see below or use Goya Sofrito)
1 packet Sazón Goya (coriander and annatto flavor)
1 teaspoon sea salt
1 (14-ounce) can fire-roasted crushed tomatoes
12 small pimento-stuffed green olives
2 bay leaves
½ green pepper, coarsely chopped
2 cups chicken broth
2 medium potatoes, skinned and cubed

Season the chicken with the Adobo seasoning. Heat the oil in a large pot or Dutch oven over medium-high heat.  Brown the chicken pieces, about 5 minutes on each side.  Set aside.

In the same pot, add the sofrito  to the remaining oil and stir briefly to release the flavors.  Add the Sazón Goya, salt, crushed tomatoes, olives, bay leaves, green pepper, chicken broth, potatoes, and browned chicken. Bring the mixture to a boil, then turn down to medium-low and simmer for 35 minutes, stirring occasionally.

Makes 4 to 6 servings

Sofrito
From Freddie's Online Puerto Rican Cookbook

8 stems cilantro
1 medium green bell pepper, chopped coarsely
1 clove garlic, crushed
1 small onion, chopped coarsely
6 leaves recao/culantro, stems removed
1 tablespoon olive oil

Drop all ingredients but olive oil into a food processor and puree. While processing, add olive oil in a stream.

Wednesday, August 09, 2006

Gretchencooks: Kålstuing (Creamed Cabbage and Red Onion)


Kålstuing (Creamed Cabbage and Red Onion)
From gretchencooks.com

1 large head cabbage, cored and chopped
1 medium red onion, chopped
1½ cups half-and-half
Juice of one lemon
Kosher salt and ground white pepper, to taste
1 teaspoon granulated sugar

Place chopped cabbage, onion, and half-and-half in a large pot. Bring to a boil. Lower heat and simmer until cabbage is soft. Add seasonings. You may need to adjust to your individual taste.

Tuesday, August 08, 2006

Scandinaviancooking: Köttbullar (Swedish Meatballs)


Well, this past weekend I went to IKEA for probably the first time ever (unless my mom snuck me there as a kid when we lived in Virginia). I've never seen such a huge warehouse of stuff that all seems so incredibly important to possess. Everything was so functional and fun! And more importantly...cheap! But the best part was waiting by the exit - the small Swedish food section. A whole little area full of fascinating things like jars of pickled herring and lingonberry jam.

When I got home, I was still in the mood for all things Swedish, so I decided on Swedish meatballs (yes, it's cliché, but delicious) for dinner.

Köttbullar (Swedish Meatballs)
Adapted from scandinaviancooking.com

½ pound ground pork
½ pound ground veal
¼ cup dry breadcrumbs (such as Progresso)
1 large egg
½ cup half-and-half
¼ teaspoon dry mustard
¼ teaspoon freshly ground nutmeg
2 tablespoons canola oil
10 medium white mushrooms, sliced
2 tablespoons all-purpose flour
2 cups beef broth

Combine the pork, veal, breadcrumbs, egg, half and half, mustard, and nutmeg until well mixed. Heat the oil in a frying pan. When it's hot, drop the meatball mixture in small rounds into the hot oil (I use a melon baller to get the right size - they should be small!). Cook for approximately five minutes or until done throughout. Drain on a paper towel. You may have to cook in batches depending on the size of your pan.

When all the meatballs are cooked, add the sliced mushrooms to the fat remaining in the pan. Sauté until soft, probably about five minutes. Sprinkle the flour over the mushrooms to absorb the oil. Add the beef broth slowly, stirring well. The broth will begin to thicken as it simmers. When the broth has started to thicken, add the meatballs back into the pan. Heat through and serve.

Makes 4 to 6 servings

Sunday, July 30, 2006

Around the World in 450 Recipes: Daigaku Imo (Caramelized Sweet Potatoes)


Do you know how hard it is to find recipes for Asian desserts?  Ridiculous.  They obviously haven't gotten the word that sugar is awesome.  They obviously are also missing out on diabetes and high blood pressure, but let's not get too technical.  This is about the only thing I could find for a Japanese sweet that didn't involve mochi or red bean paste.  And they're actually not too bad.  Good job, Japan.

Daigaku Imo (Caramelized Sweet Potatoes)
From Around the World in 450 Recipes by Sarah Ainley

1¼ pounds sweet potatoes
2 to 3 tablespoons canola oil
½ cup granulated sugar
3 tablespoons water
1 tablespoon mizuame (Japanese potato syrup), Lyle's golden syrup, or honey
Black sesame seeds (for garnish)

Peel the sweet potato and slice in half lengthwise. Slice each half into half-moons, about ½-inch thick.

Heat the oil in a large frying pan over medium-high heat. Add the sweet potato and fry until the potato begins to soften. Drain the sweet potato slices on a piece of paper towel and set aside.

Heat the sugar and water in small saucepan over medium heat. The water will come to a simmer and the sugar will melt. Continue to cook until the sugar caramelizes and turns a nutty brown color. Remove the syrup from the heat and stir in the mizuame. Return the syrup to the heat and toss the sweet potatoes in the syrup. When warm, pour the potatoes into a serving dish and sprinkle with black sesame seeds.

Makes 4 servings

Saturday, July 29, 2006

CDKitchen: Onigiri and Around the World in 450 Recipes: Tsukune

Okay, eventually I was going to make Japanese food. It was a given, considering the mountain of books on Japanese culture currently littering the floor of my bedroom. But unfortunately for me, and many other Americans, good Japanese cookbooks are few and far between. And really thin. And I am convinced that the Japanese have to eat more than the same twenty dishes.

I made the rice for the onigiri in my handy Zojirushi rice maker that sings to me. (On a side note, why do Japanese appliances sing to you? Even the toilets sing.) I can easily see why these are so popular for lunches and picnics.  They're like sandwiches, except better.  I am now officially jealous of all the people that get to eat like this on a daily basis. Which is probably the whole nation of Japan.

My only irritation came when I purchased the ground chicken. I really wanted a combination of dark and white meat, but here in the US, if you eat ground chicken, people think you MUST be a health nut, and therefore, you only want ground chicken breast.  The butcher already looked harassed enough, so I let it go.

Onigiri (Rice Balls)
From CDKitchen

4 ounces salmon fillet
2 teaspoons sea salt
4 cups medium-grain rice
1 envelope bonito shavings
5 seasoned plums (umeboshi)
2 sheets nori (seaweed wrappers)

Preheat the oven to 400°F.  Rinse salmon and pat dry with a paper towel.  Sprinkle with salt.  Place the salmon on a rack over a cookie sheet or small dish and bake for an hour to dry it out.

Cook the rice according to package directions (i.e. without adding fat) so that it's sticky.

Prepare three bowls. When the salmon is done, ground the fillet up into small pieces with a fork or mortar and pestle and place in the first bowl.  Mash the seasoned plums with a fork and place in the second bowl.  Empty the contents of one small bonito shavings envelope into the third bowl.  Divide the cooked rice into three portions, and add one portion to each bowl.   Mix lightly to combine with seasoning ingredients.

Wet hands slightly.  Dip one fingertip into leftover salt and smear the salt across your palms so that sticks on both hands.  Take ¼ of rice mixture from the first bowl.  Form into a ball.  Make it compact, but not so much that the grains of rice become mush.  Form into a triangle, square, or cylinder.  Repeat for the remaining rice.  Each seasoning bowl should yield four rice balls, for a total of twelve.  Place each one on a piece of parchment paper to keep them from sticking.

Cut each sheet of nori into three strips lengthwise, then cut each strip in half.  Wrap one small strip of nori around the bottom of each rice ball to form an envelope to hold it with.  Serve immediately.

If you won't be serving immediately, wait to wrap the rice in the nori, as it will absorb water from the rice and lose its crunch.  Instead, wrap tightly in plastic wrap and refrigerate.  Let the rice balls come to room temperature before serving.

Makes 12 servings

Tsukune (Chicken Cakes with Teriyaki Sauce)
From Around the World in 450 Recipes by Sarah Ainley

1 pound ground chicken
1 large egg
¼ cup grated white onion
1½ teaspoons granulated sugar
1½ teaspoons soy sauce
Cornstarch, for coating
½ bunch green onions, finely shredded, to garnish
1 tablespoon oil
Teriyaki Sauce

Teriyaki Sauce:
2 tablespoons granulated sugar
2 tablespoons mirin
2 tablespoons sake or dry white wine
2 tablespoons soy sauce

Mix the ground chicken with the egg, grated onion, sugar and soy sauce until the ingredients are thoroughly combined and well bound. This process takes about 3 minutes, until the mixture is quite sticky, which makes for good texture. Shape the mixture into 12 small, flat, round cakes and dust them lightly all over with cornstarch.

Soak the scallions in cold water for 5 minutes and drain well.

Heat the oil in a frying pan. Place the chicken cakes in a single layer, and cook over medium heat for 3 minutes. Turn the cakes and cook for 3 minutes longer.

Mix the ingredients for the sauce and pour it into the pan. Turn the chicken cakes occasionally until they are evenly glazed. Move or gently shake the pan constantly to prevent the sauce from burning.

Arrange the chicken cakes on a plate and top with the scallions. Serve immediately.

Makes 12 tsukune

Monday, July 24, 2006

Dim Sum: The Art of the Chinese Tea Lunch: Gau Choi Gau (Chinese Chive Dumplings)


After trying the amazing siu mai from my new dumpling book, I knew I had to keep creating.  I had managed to procure some Chinese chives from the Chinese grocery, and one dumpling I absolutely love in the chive dumpling.  The shell is almost see-through, so you get a glimpse of the green chives in filling (see round dumplings in back of picture).  These were absolutely amazing, crunchy on the outside and pungent and garlic-y on the inside.

Gau Choi Gau (Chinese Chive Dumplings)
From Dim Sum: The Art of the Chinese Tea Lunch by Ellen Leong Blonder

1½ teaspoons salt
½ pound Chinese chives, cleaned, trimmed, and cut in ½-inch lengths
4 ounces shrimp, peeled, deveined, and cut in ¼-inch dice (about ½ cup)
½ teaspoon soy sauce
 teaspoon ground white pepper
½ teaspoon toasted sesame oil
1 teaspoon cornstarch
Wheat Starch Dough, substituting 1 tablespoon glutinous rice flour for 1 tablespoon of the tapioca flour
Peanut or vegetable oil, for pan-frying

Bring 2 quarts of water and 1 teaspoon of the salt to a boil in a large saucepan.  Add the chives and blanch for 1 minute over high heat.  Drain the chives in a colander, and rinse under cold water to stop the cooking.  Squeeze the chives dry and transfer them to a medium bowl.  (You should have about 1¼ cups.)

Preheat the oven to 200°F.

Combine the chives with the remaining ½ teaspoon salt, the shrimp, soy sauce, white pepper, sesame oil, and cornstarch.  Set aside.

Cut each cylinder of the wheat starch dough crosswise into 6 pieces.  Put on piece of dough, cut side up, between two 6-inch squares of baking parchment; then position the flat side of a cleaver blade or a flat bottom of a pan over it and press straight down to form a 3½-inch circle.  Peel off the parchment.

Spoon about 2 teaspoons of the filling onto the center of a circle of dough.  Make 8 to 10 pleats all around the edge, bringing up the sides evenly, and then pinch closed.  Turn the dumpling pinched side down, and pat it gently to flatten it into a 2-inch disk.  Repeat with the remaining dough and filling.  Lightly dust a board with wheat starch; then place the finished dumplings on it.

Heat a large skillet over medium-high heat, and then add 1 tablespoon oil.  When it is almost smoking, arrange one layer of dumplings in the skillet, leaving enough room so they are not touching one another.  Cook the dumplings for 2 to 3 minutes on each side, pressing them gently with a spatula, until they turn crisp and just begin to brown.  Carefully add ½ cup water (it will spatter), cover the skillet tightly, reduce the heat to low, and cook for 3 minutes, or until the dough becomes somewhat translucent around the sides.  Uncover, raise the heat to medium, and cook for 3 to 4 minutes longer, or until the water has evaporated; turn the dumplings to cook until both sides become slightly crisp and light brown.  Transfer the dumplings to a serving plate, cover them lightly with foil, and keep them warm in the oven while you make the next batches.  Serve hot.

Makes about 18 dumplings

Wheat Starch Dough
1¼ cups wheat starch plus ¼ cup tapioca flour
½ teaspoon salt
1 cup boiling water
1 teaspoon peanut or vegetable oil

In a medium bowl, combine the wheat starch, tapioca flour, and salt.  Add the boiling water and the oil and stir with chopsticks or a wooden spoon.  While the dough is still very hot, turn it out onto a board dusted with 1 tablespoon of wheat starch.  Knead until smooth, adding a little more wheat starch if necessary.  The dough should be soft but not sticky.

Divide the dough into thirds.  Use your palms to roll each portion into an 8-inch cylinder.  Cover loosely with a slightly damp paper towel to keep the dough from drying out.  The dough is now ready to cut and press or roll out as needed.