Sunday, November 07, 2021

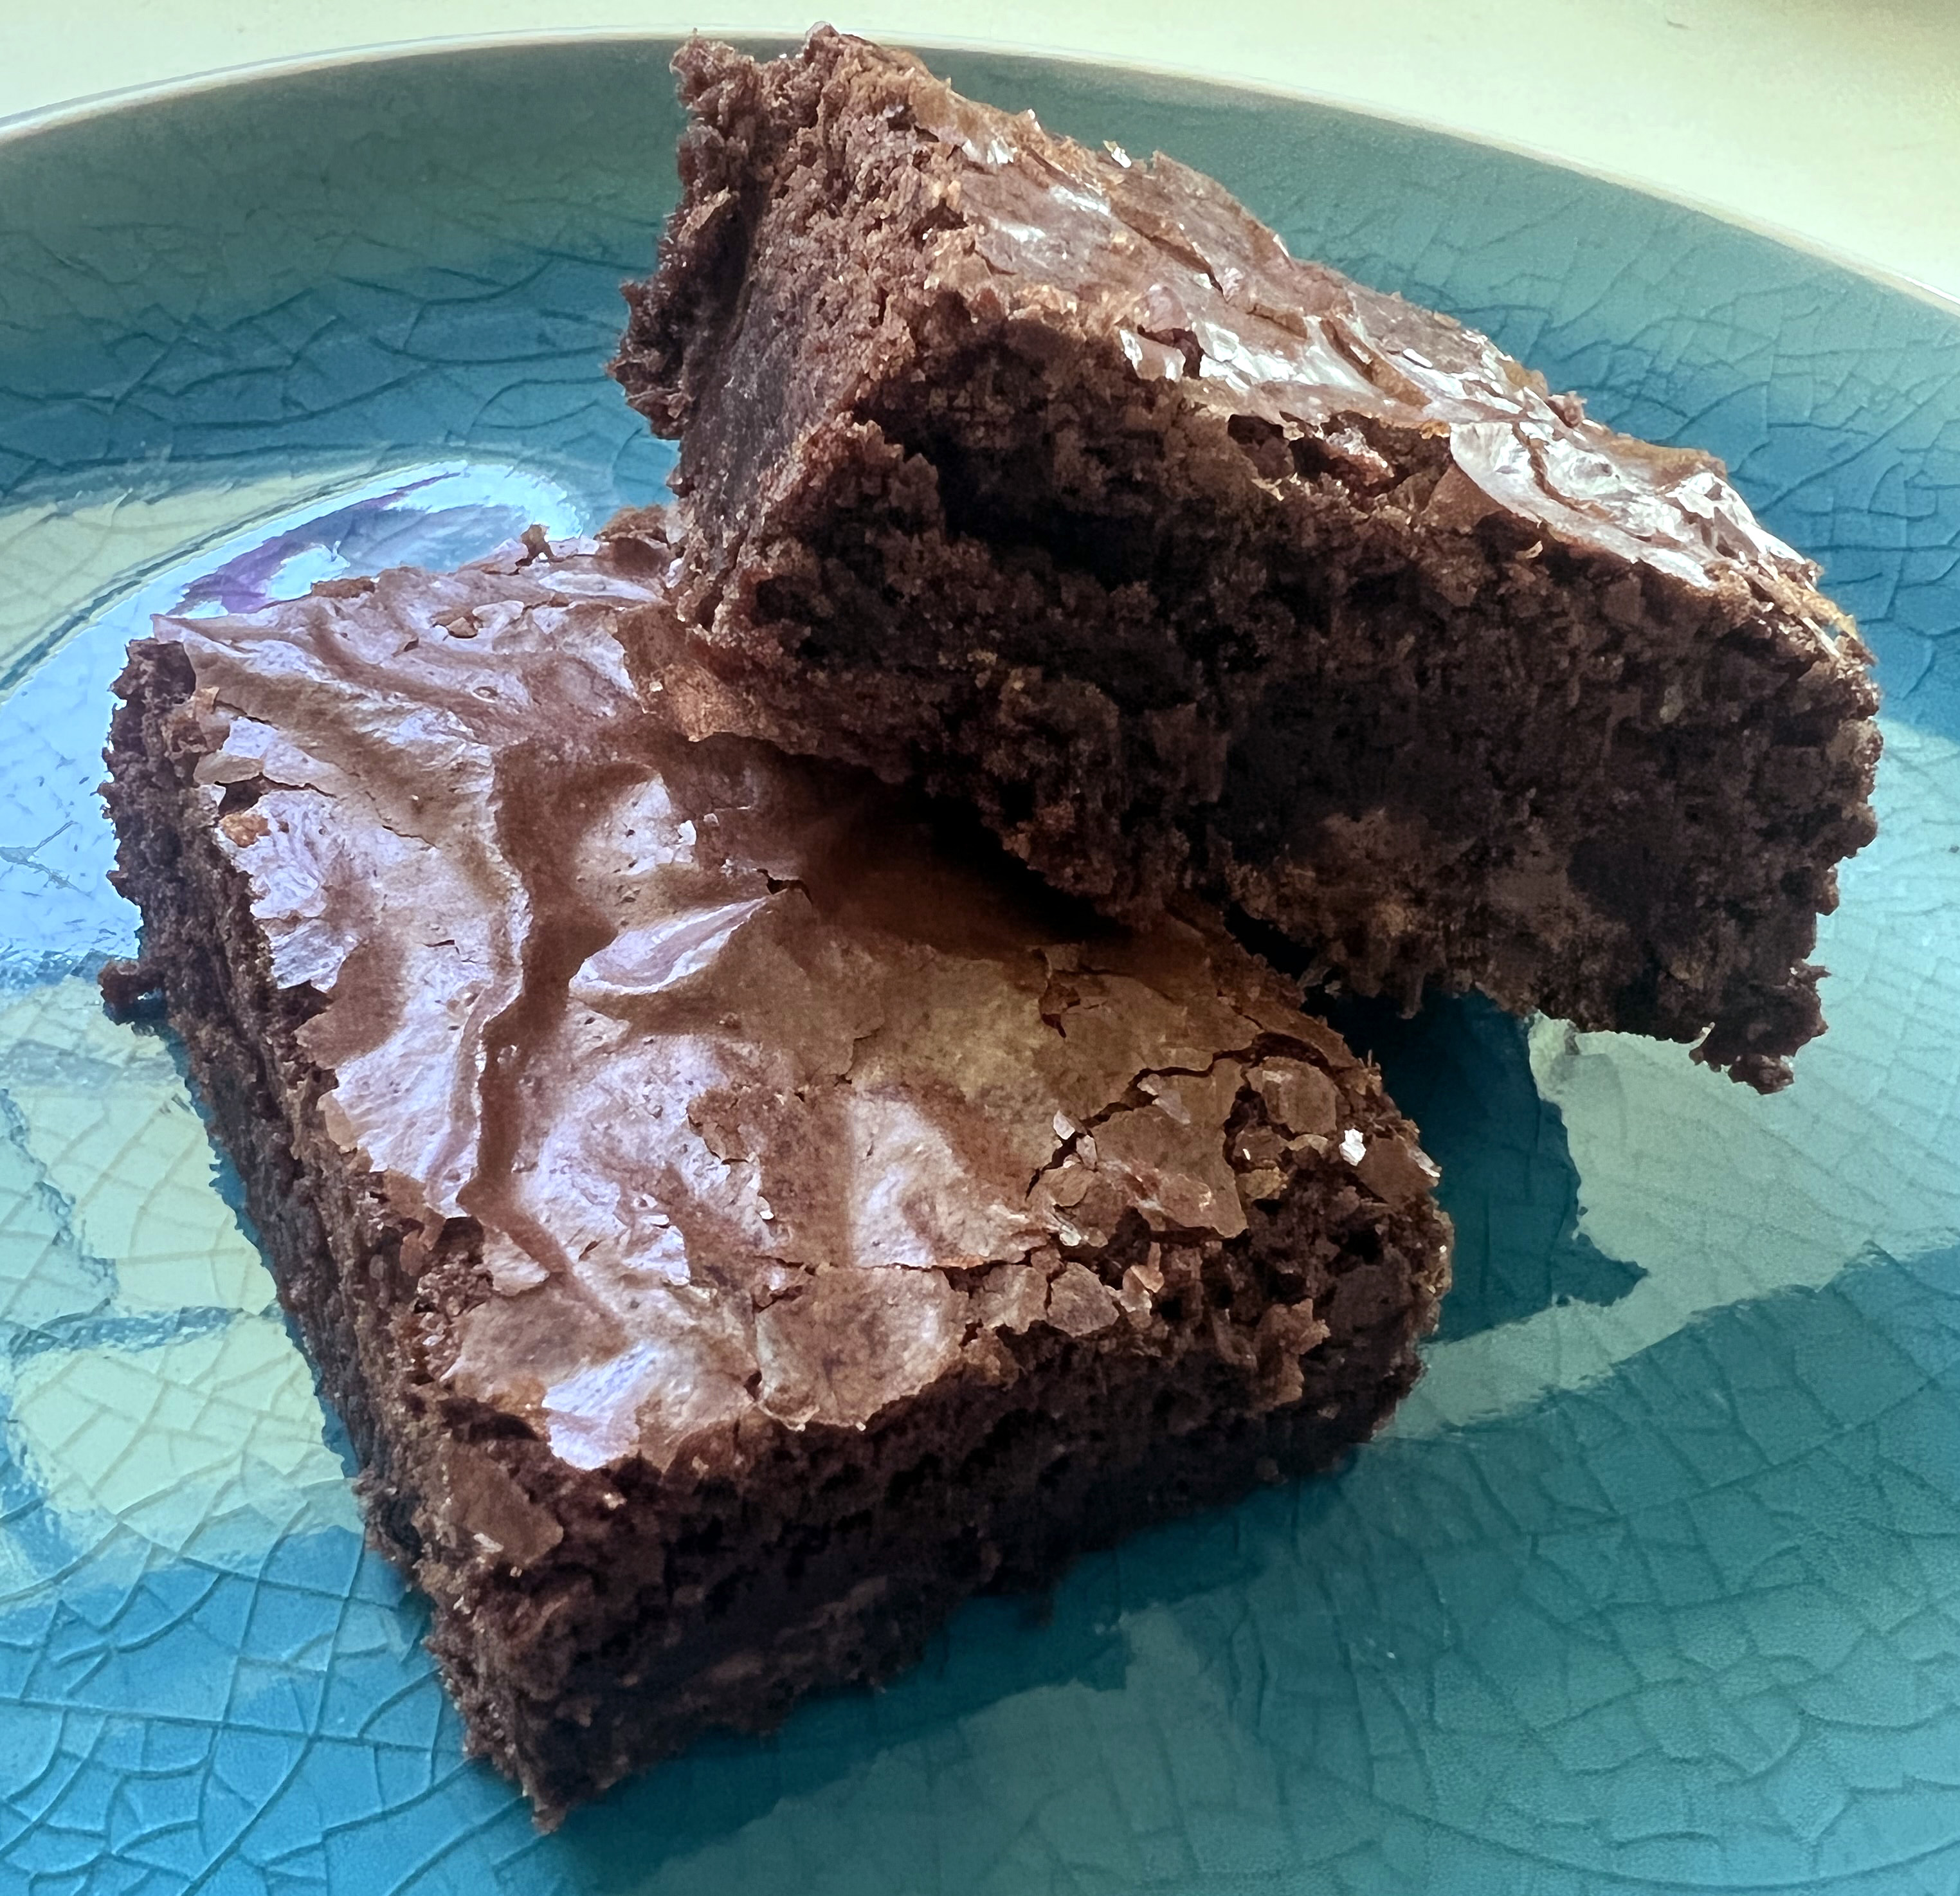
The Stay at Home Chef: Best Brownie Recipe Ever


I already have a pretty awesome brownie recipe that my mother has been making since before I can remember, but the combination of the "best" accolade and the fact that this one has chocolate chips in the mix made me curious to try it.  Sure enough, these are pretty awesome.  Plus, I think these are pretty easily scaled up for large gatherings.

Note: Instead of using the parchment paper, I just sprayed the pan with cooking spray.  I used Valrhona cocoa powder in the mix; the cocoa powder you choose will definitely impact the depth of the chocolate flavor.

Best Brownie Recipe Ever
From The Stay at Home Chef blog

10 tablespoons salted butter, melted
1 cup granulated sugar
2 large eggs
2 teaspoons vanilla extract
½ cup milk chocolate chips, melted
¾ cup all-purpose flour
¼ cup unsweetened cocoa powder
½ teaspoon salt
1 cup milk chocolate chips

Preheat oven to 350°F. Line a metal 9x9-inch pan with parchment paper.

Pour melted butter into a large mixing bowl. Whisk in sugar by hand until smooth, 30 seconds. Add in eggs and vanilla extract. Whisk 1 minute. Whisk in melted chocolate until combined and smooth.

Use a rubber spatula to stir in flour, cocoa powder, and salt until just combined. Stir in whole chocolate chips. Pour into prepared pan and smooth out.

Bake for 30 minutes. Let cool in pan 30 minutes before slicing.

Makes 9 servings

Saturday, October 30, 2021

The First Year Blog: Bubbling Witch's Cauldron Brownies


I'm not sure why, but I really enjoy Halloween.  Maybe because it's the one day a year where even adults get to dress up and act silly, and there's no judgement.  Plus, you get to eat weird food that walks that line between delicious and just a little bit creepy.  Like these little brownie cauldrons full of a green witch's concoction and eyeballs.  Definitely fun for the kids, too.

Bubbling Witch's Cauldron Brownies
From The First Year Blog

1 box brownie mix, plus the required ingredients
½ cup (1 stick) unsalted butter, at room temperature
1 to 2 cups powdered sugar
Green food gel (such as Wilton leaf green gel food coloring)
Large green nonpareil sprinkles
Small green nonpareil sprinkles
Eyeball sprinkles
Pretzel sticks

Preheat the oven and prepare the brownie mix as directed on the box.

Spray a mini muffin pan with non-stick cooking spray. Fill each muffin well ⅔ full with brownie batter. Bake for 10 to 15 minutes or until a toothpick inserted comes out clean.

Remove from the oven and use a ½ tablespoon to create indentations in each brownie. Allow the brownies to cool completely then remove from the pan.

To make the buttercream, beat the butter with an electric mixer until smooth, 30 seconds. Gradually add in the powered sugar, beating until incorporated. Add in a small amount of green food coloring, beat until mixed.

Use a spoon to put a dollop of buttercream in each brownie cauldron. Use the spoon to create wisps in the buttercream.

Add large green nonpareils, small green nonpareils, and eyeballs to the buttercream. If you want to create the look that the cauldron is bubbling over, have the buttercream go down the side of the brownie and add nonpareils. Add a broken pretzel stick to each cauldron as a stir spoon.

Serve or store on the counter until ready to serve if serving the same day, otherwise store in an airtight container until ready to serve.

Makes 24 brownies

Sunday, October 10, 2021

Taco Bell Enchirito and Meximelt with Top Secret Recipes: Taco Bell Seasoned Ground Beef


Having worked at Taco Bell for a year or so when I was 16, I never thought I would see the day that I'd be actively trying to replicate dishes that I regularly had to slop together during my shift.  No, really.  But there's something kind of nostalgic about these food items that I used to eat when I was a kid, but that are no longer on the menu.  The trick to both of these items is the infamous steamer.  This is a unit that uses steam to melt the cheese on menu items, but it also makes the tortillas more pliable.  You almost can't replicate this at home.  Almost.  I was able to get a similar finish using a cheap handheld fabric steamer.  Or having failed that, the microwave.

Taco Bell Seasoned Ground Beef
From Top Secret Recipes

1 pound ground beef
¼ cup all-purpose flour
1 tablespoon chili powder
1 teaspoon salt
½ teaspoon dried minced onion
½ teaspoon paprika
¼ teaspoon onion powder
Dash garlic powder
½ cup water

In a medium bowl, combine the ground beef with the flour and spices. Use your hands to thoroughly mix the ingredients into the ground beef.

Add the seasoned beef mixture to the water in a skillet over medium heat. Mix well with a wooden spoon or spatula, and break up the meat as it cooks. Heat for 8 to 10 minutes, or until browned. The finished product should be very smooth with no large chunks of beef remaining.

Enchirito

Small fajita-size flour tortillas
1 can vegetarian refried beans
Taco Bell Seasoned Ground Beef (above)
Diced white onion
1 can La Victoria red enchilada sauce
Finely shredded Cheddar cheese
Sliced black olives

Warm the tortillas. Heat up the refried beans in a medium saucepan over medium heat.

Spoon about 3 tablespoons of refried beans down the center of each tortilla. Spoon 3 tablespoons of beef on top of the beans followed by a couple teaspoons of minced onion. Roll the fillings up in the tortilla, then flip the tortilla over so that the seam is on the bottom. Spoon the enchilada sauce over the top, then sprinkle with cheese and place three olive slices down the length of the enchirito. Using a handheld fabric steamer, point the steam at the cheese until it melts or microwave, covered, until the cheese melts.


Meximelt

Taco Bell Seasoned Ground Beef (above)
Small fajita-size flour tortillas
Pico de gallo
Three cheese blend (equal parts shredded mozzarella, Cheddar, and Monterey Jack)

Warm the tortillas.  Take one flour tortilla, spoon about ¼ cup seasoned ground beef down the center, then a couple of tablespoons of pico de gallo, then sprinkle with three cheese blend.  Using a handheld fabric steamer, point the steam at the cheese until it melts or microwave, covered, until the cheese melts.  Fold in half like a taco or roll up into a burrito to eat.

Sunday, September 26, 2021

How to Roast a Lamb: Tomato and Green Bean Salad


Whenever I see those super cool yellow wax beans at the grocery store, I have this itch to fill up a bag and go to town.  Cool produce just calls to me.  But inevitably I get it home and then seem to be at a loss of what to actually make with it.  Luckily for this trip I was in possession of this fantastic salad recipe that takes advantage of all of the flavor and beauty of the late summer harvest.  A fresh and delicious end to the summer.

Tomato and Green Bean Salad
From How to Roast a Lamb, as seen at Leite's Culinaria

For the red wine and feta vinaigrette:
½ cup red wine vinegar
1 small onion, sliced and grilled until tender
6 basil leaves
1 teaspoon thyme leaves
¼ cup crumbled feta cheese
2 tablespoons Dijon mustard
6 garlic cloves, smashed
2 shallots, thickly sliced
2 tablespoons dried Greek oregano, or less to taste
2 to 3 teaspoons kosher salt, or to taste
1 tablespoon freshly ground black pepper
¾ cup extra-virgin olive oil

For the salad:
½ pound string beans, preferably a mix of green beans and yellow wax beans, ends trimmed
⅓ to ½ cup Red Wine and Feta Vinaigrette (above)
2 tablespoons crumbled feta cheese
4 vine-ripe tomatoes, preferably heirloom, cut into rough wedges
1 teaspoon dried Greek oregano
½ small red onion, thinly sliced and separated into rings
6 small sprigs flat-leaf parsley, leaves picked and torn
6 small sprigs dill, leaves picked and torn
16 leaves mint, torn
Kosher salt and freshly ground black pepper

Make the vinaigrette:
Combine the vinegar, onion, basil, thyme, feta, mustard, garlic, shallots, oregano, salt, and pepper in the bowl of a food processor. With the motor running, slowly drizzle in the olive oil until smooth and satiny. Season the dressing with pepper. You can use the vinaigrette immediately or set it aside for up to several days, stirring to recombine just before using.

Assemble the salad:
Bring a pot of salted water to a boil. Fill a large bowl halfway with ice water. Blanch the beans until tender but still snappy, about 3 minutes. Then use tongs or a large slotted spoon to move them to the ice water bath, swishing them around. Drain well and place on a clean kitchen towel to dry.

In a bowl, combine the beans, feta, tomatoes, oregano, red onion, torn herbs, and as much of the vinaigrette as you desire and toss well. Taste and adjust the seasoning with salt and pepper, although taste it first as you may not need more salt due to the feta.

Makes 4 to 6 servings

Saturday, September 11, 2021

Southern Living: Sausage-Hash Brown Breakfast Casserole


If you're looking for a hearty breakfast casserole for a cold morning, this is the answer.  I've tried the ones with bread, which are like savory bread puddings, but there's just something about the texture that doesn't do it for me.  I much prefer this version of breakfast casserole, which basically resembles a giant anything-goes hash brown.  What's not to love?

Note: This casserole is definitely open to interpretation.  I had some leftover mushrooms and a bunch of green onions, so I added those to the mix.

Sausage-Hash Brown Breakfast Casserole
From Southern Living magazine

1 pound mild pork breakfast sausage
1 pound hot pork breakfast sausage
1 (30-ounce) package frozen hash browns
1½ teaspoons kosher salt, divided use
½ teaspoon freshly ground black pepper
1 cup shredded sharp Cheddar cheese, plus additional for top, if desired
6 large eggs
2 cups whole milk

Preheat oven to 350°F.

Cook mild and hot sausage in a large skillet over medium-high heat until sausage crumbles and is no longer pink. Drain well.

Prepare hash browns according to package directions, using ½ teaspoon salt and pepper. Stir together hash browns, sausage, and cheese. Pour into a lightly greased 9x13-inch baking dish.

Whisk together the eggs, milk, and remaining 1 teaspoon of salt. Pour evenly over potato mixture. Bake for 35 to 40 minutes.

Makes 10 servings

Sunday, August 22, 2021

Au Pied de Cochon: Creamy Smoked Trout Pappardelle


I keep seeing smoked trout at my local fancy grocery store, and I keep meaning to try it with...something.  Except I keep passing it by.  So when I saw this recipe (originally made with a different smoked fish), I decided this was the time to try it.  I'm a super big fan of smoked salmon, but I wasn't sure what I was going to get with this dish.  Fortunately, it's a creamy, smoky bowl of goodness, although it can be a bit heavy and rich.  I recommend a nice fresh salad on the side.

Creamy Smoked Trout Pappardelle
Adapted from Au Pied de Cochon restaurant, Montreal, Canada, as seen in Come In, We're Closed

2 tablespoons unsalted butter
1 shallot, finely chopped
½ cup dry white wine
2 thyme sprigs
1 quart heavy whipping cream
1 cup finely grated Parmigiano-Reggiano
Freshly squeezed lemon juice, to taste
Kosher salt and freshly ground black pepper, to taste
1 pound fresh pappardelle
8 ounces smoked trout, in chunks
2 tablespoons minced parsley or chives

Heat a medium sauté pan over medium-high heat.  Melt the butter and, when frothy, add the shallots and cook until translucent, about 2 minutes.  Add the white wine and reduce until no liquid remains.  Add the thyme and cream.  After bringing to a boil, lower the heat and briskly simmer until the liquid has reduced by half, about 20 minutes.  Stir occasionally (especially towards the end) to avoid scorching.

Add the cheese and stir until melted.  Season with a squeeze of lemon, salt, and pepper.  Keep warm but do not over-reduce or the cream will break.

Bring a large pot of salted water to a boil.  Warm your guests' pasta bowls in a low oven - this dish congeals quickly on cold plates and tastes best warm.  Boil the fresh pasta to al dente (about 4 minutes), then drain.  Portion the pasta into the warm bowls and layer a few slices of trout on top; spoon the sauce over everything, and sprinkle with parsley or chives.  Serve immediately.

Makes 6 servings

Saturday, August 07, 2021

Bobby Flay: Ancho and Coffee-Rubbed Filet Mignon with Ancho-Mushroom Sauce


I have never owned a grill, at least not one that I could use living in an apartment with an overzealous fire marshal for a decade, so I've tended to shy away from making steak.  However, this steak is definitely an exception.  I originally learned about this recipe in a cooking class a million years ago, but I loved it then, and I'm still a fan.  The sauce will taste pretty spicy from the ancho chiles, but once it joins the steak, everything just...works.

Note: For the mushrooms, I used blue foot, hedgehog, and blue oyster because those are the ones that looked best at the time.

Ancho and Coffee-Rubbed Filet Mignon with Ancho-Mushroom Sauce
Adapted from Bobby Flay's Mesa Grill, as seen in Bon Appétit magazine, September 2005

4 (1½-inch thick) filet mignon steaks (each about 12 ounces), at room temperature
2 tablespoons olive oil
Spice Rub (below)
Mushroom Sauce (below)
6 tablespoons chopped fresh cilantro, divided use

Preheat the oven to 400°F.

Sprinkle both sides of the steaks generously with Spice Rub. Heat large ovenproof skillet over medium-high heat.  Add olive oil.  Add steaks and sear until brown and crusty, 2 minutes per side.  Then insert a meat thermometer and transfer the pan to the oven. Cook until desired doneness, about 10 minutes for medium-rare.  The thermometer should register 130-140°F for medium rare, 140-150°F for medium.

Meanwhile, rewarm Mushroom Sauce.  Mix in  4 tablespoons cilantro.  Thin sauce with remaining reduced broth by tablespoonfuls, if desired.

Transfer steaks to plates.  Spoon sauce over.  Sprinkle with remaining 2 tablespoons cilantro.  

Makes 4 servings

Spice Rub

2 tablespoons ancho chile powder
2 tablespoons instant espresso powder
2 tablespoons packed dark brown sugar
1 tablespoon ground coriander
1½ teaspoons dried oregano
1½ teaspoons kosher salt
1½ teaspoons freshly ground black pepper
¼ teaspoon cayenne pepper

Mix all ingredients in a small bowl. Set aside.  (Can be made one week ahead of time.  Cover and store at room temperature.)

Mushroom Sauce

3 dried ancho or pasilla chiles
6 cups chicken broth
3 tablespoons olive oil
1½ cups chopped red onion
4 garlic cloves, chopped
1½ pounds assorted fresh wild mushrooms, such as shiitake, cremini, and oyster, thickly sliced if large
2 cups dry red wine
Cayenne pepper

Place chiles in medium bowl.  Pour enough boiling water over to cover.  Let soak until chiles soften, turning occasionally, about 30 minutes.  Transfer chiles to a blender along with ½ cup soaking liquid.  Blend until smooth.  (Puree can be made 3 days ahead.  Transfer to bowl.  Cover and chill.)

Boil broth in large saucepan over high heat until reduced to 2 cups, about 25 minutes.  Set reduced broth aside.

Heat oil in heavy large skillet over medium-high heat.  Add onions; sauté until beginning to soften, about 4 minutes.  Add garlic and stir 1 minute.  Add mushrooms.  Sauté until brown and tender and almost all juices have evaporated, about 9 minutes.  Add wine and boil until almost all wine has evaporated, about 9 minutes.  Mix in chile puree and 1½ cups reduced chicken broth.  Simmer 1 minute to blend flavors.  Season sauce with cayenne, salt, and pepper.  (Can be made 1 day ahead.  Cover, chill sauce and remaining reduced broth separately.)

Saturday, July 31, 2021

Bake It With Love: Air Fryer Rotisserie Chicken


One of my new toys during the pandemic was an air fryer.  Because at this point everyone seems to have one but me.  But I decided to go the ultimate route and get one that also has a rotisserie function, because who doesn't like a rotisserie chicken, with all that juicy meat and crispy skin?  Now, you have to use a pretty small chicken for this, because those big 5-pounders won't fit, but if you get everything trussed the right way, in less than an hour you'll have a delicious golden chicken on your plate.

Note: I opted to just season with Lawry's seasoned salt, as that is what my favorite store-bought chicken is seasoned with.  This lets the true flavor of the chicken shine, but if you have a delicious rub, feel free to use that.

Air Fryer Rotisserie Chicken
Adapted from Bake It With Love blog

1 (3½-pound) whole fryer chicken
Canola oil
Lawry's seasoned salt

Empty out the body cavity (remove any gizzards, if inside), place your chicken on a clean cutting board, and pat the chicken dry with paper towels. Trim the tail off, if desired, as well as any excess skin or fatty deposits.

Drizzle oil on your fryer chicken and rub it into the skin on all sides of the chicken. Sprinkle seasoned salt on your chicken, rub it into the skin, and rub the seasoning into the inside of the bird as well.

Truss your chicken with kitchen twine so that the wings and legs are bound. Otherwise, they will flop loosely with each rotation of the chicken. Once your whole fryer is trussed, push the rotisserie spit (or rod) through the chicken and use the forks included with your Vortex Plus to secure each end of the chicken to the rotisserie rod. Line your drip pan with aluminum foil for easy cleanup, then set your air fryer so it is preheating to 380ºF.

There will be options to 'air fry' or 'roast' the chicken. While both will work, with a very similar cook time, the 'air fry' option will give a crispier skin. Set the air fryer cooking time for 40 minutes and wait for the indicator to 'add food'.

After your air fryer is preheated, load the rotisserie spit in by pulling the red lever on the left and latching it into the left side of the rotisserie first. Slide the rod along the metal bar on the right until the rod drops into the catch and is securely in place. Close your air fryer door and cook for 40 minutes.

Check your chicken's internal temperature after the 40 minutes, and continue to cook in 5 minute intervals until your chicken has an internal temperature of 165ºF at the thickest points. This is the USDA food safety recommended internal temperature, that should be read using a digital meat thermometer.

To remove your air fryer rotisserie chicken, press the red lever down on the left side and lift the spit out using the y-rod that came your Instant Pot Vortex Plus or rotisserie air fryer. Transfer the cooked chicken to a cutting board, plate, or platter and cover loosely with aluminum foil to rest for 5 to 10 minutes before serving.

Makes 4 servings

Saturday, July 17, 2021

Bon Appétit: Triple-Cherries Jubilee


When you think about old-timey, 1950's-ish era desserts, I think one of the images that comes to mind is a saucepan on a rolling cart, with blue flames licking the sides, and a beautiful syrup of cherries in the bottom.  I have literally never had this at a restaurant, but that's still the image that comes to my mind.  So of course I had to see what the fuss was about.  Much like Bananas Foster, this dessert comes together pretty quickly and actually makes a pretty not-too-sweet topping for ice cream or pound cake or angel food cake or whatever dessert item you want to spread it on.  Plus, it's dessert with a show.

Note: I used Ben & Jerry's Cherry Garcia ice cream as my base.  I recommend you do, too.

Triple-Cherries Jubilee
From Bon Appétit magazine, September 1999

1 (1-pound) bag frozen dark sweet cherries, thawed
2 cups plus 1 tablespoon cherry juice, divided use
½ cup dried tart cherries
3 tablespoons granulated sugar
1 vanilla bean, split lengthwise
1 tablespoon arrowroot powder
¼ cup thin matchstick-size strips orange peel (orange part only)
⅓ cup kirsch
1 quart vanilla or cherry-vanilla-swirl ice cream

Place sieve over bowl. Add thawed cherries; let drain. Pour drained juices into heavy medium skillet; set cherries aside.

Mix 2 cups cherry juice, dried cherries, and sugar into the skillet with the drained juice. Scrape in seeds from the vanilla bean; add bean. Boil sauce until reduced to 1½ cups, stirring occasionally, about 12 minutes. Mix arrowroot with remaining 1 tablespoon cherry juice in a small bowl. Whisk into sauce. Boil until thickened, about 1 minute. Discard vanilla bean. Mix in drained cherries and orange peel.

Heat kirsch in skillet over low heat. Remove from heat. Carefully ignite kirsch with match. Carefully pour flaming kirsch into sauce. Scoop ice cream into bowls. Spoon sauce over.

Makes 6 servings

Sunday, May 09, 2021

Cuisine at Home: Breakfast Sausage Meatballs with Blackberry Glaze


It's that time again - Mother's Day!  Which is still a little tricky considering the current state of things, ie. COVID, but we do what we can.  We decided to do a little brunch get-together, so I had to find something absolutely scrumptious to bring for my offering.  Luckily I found these cute little sausage balls that remind me of the appetizer with meatballs in jelly.  They were delicious, with the sweetness of the blackberry jam working as perfect foil for the meaty sausage and earthy sage.

Breakfast Sausage Meatballs with Blackberry Glaze
From Cuisine at Home

For the meatballs:
2 eggs, beaten
1 cup panko
2 teaspoons dried sage
1½ teaspoons kosher salt
1 teaspoon black pepper
1 cup chopped yellow onions
1 clove garlic, minced
2 pounds bulk breakfast sausage

For the glaze:
¾ cup seedless blackberry jam
2 tablespoons red wine vinegar
Pinch of salt

Preheat oven to 400°F with a baking sheet inside.

For the meatballs, combine eggs, panko, sage, salt, and pepper. Mince onions and garlic in a food processor. Combine sausage, egg mixture, and onion mixture. Portion meatball mixture with a #30 scoop (2 tablespoons).

Transfer meatballs to preheated baking sheet and bake until a thermometer inserted into centers registers 165°F, 12 to 15 minutes. Transfer meatballs to a serving platter.

For the glaze, heat jam, vinegar, and salt in a saucepan over medium heat until jam melts and bubbles around edges. Pour glaze over meatballs.

Makes 12 servings