Monday, May 25, 2009

Ball Complete Book of Home Preserving: Sweet Cherry Jam and Brandied Apricot Preserves

As part of my recent effort to not eat preservatives, strange chemicals, and things I can't spell or pronounce, I have started canning my own food. Even though it heats up my kitchen for hours and renders me a sweaty mess.  Since apricots and California cherries were on sale this week, they were the first things to make it into a jar.

The two recipes I made were the Sweet Cherry Jam (with all suggested additions, including amaretto liqueur) and the Brandied Apricot Preserves. And yes, I love liqueur in my food. I've got to admit, from what I tasted while filling my little jars, these recipes turn out some pretty fabulous jam and preserves. Next up, if I'm feeling ambitious, is possibly some Blueberry Butter? And no, that's not butter as in cow's milk.

Sweet Cherry Jam
From Ball Complete Book of Home Preserving

4 cups chopped pitted sweet cherries
4 tablespoons lemon juice
½ teaspoon ground cinnamon (optional)
½ teaspoon ground cloves (optional)
¼ cup amaretto liqueur (optional)
1 (1¾-ounces) package regular powdered fruit pectin
5 cups granulated sugar

Prepare canner, jars, and lids.

In a large, deep stainless steel saucepan, combine cherries, lemon juice, cinnamon, cloves, and amaretto liqueur, if using.  Whisk in pectin until dissolved.  Bring to a boil over high heat, stirring frequently.  Add sugar all at once and return to a full rolling boil, stirring constantly.  Boil hard, stirring constantly, for 1 minute.  Remove from heat and skim off foam.

Ladle hot jam into hot jars, leaving ¼-inch headspace.  Remove air bubbles and adjust headspace, if necessary, by adding hot jam.  Wipe rim.  Center lid on jar.  Screw band down until resistance is met, then increase to fingertip-tight.

Place jars in canner, ensuring they are completely covered with water.  Bring to a boil and process for 10 minutes.  Remove canner lid.  Wait 5 minutes, then remove jars, cool and store.

Makes about 6 8-ounce jars

Brandied Apricot Preserves
From Ball Complete Book of Home Preserving

5 cups sliced pitted fresh apricots
2 cups chopped cored peeled tart apples
2 cups granulated sugar
½ cup liquid honey
2 tablespoons lemon juice
1 cup brandy

In a large stainless steel saucepan, combine apricots, apples, sugar, honey, and lemon juice.  Stir to mix well.  Cover and let stand at room temperature for 40 minutes.

Meanwhile, prepare canner, jars, and lids.

Bring reserved apricot mixture to a boil over medium heat, stirring to dissolve sugar.  Reduce heat and boil gently, stirring frequently, until mixture thickens, about 25 minutes.  Remove heat and test gel.  If gel stage has been reached, skim off foam.  Stir in brandy and return to medium heat.  Boil gently, stirring constantly, for 5 minutes.  Remove from heat and skim off foam.

Ladle hot jam into hot jars, leaving ¼-inch headspace.  Remove air bubbles and adjust headspace, if necessary, by adding hot preserves.  Wipe rim.  Center lid on jar.  Screw band down until resistance is met, then increase to fingertip-tight.

Place jars in canner, ensuring they are completely covered with water.  Bring to a boil and process for 10 minutes.  Remove canner lid.  Wait 5 minutes, then remove jars, cool and store.

Makes about 6 8-ounce jars

Saturday, May 23, 2009

Cathal Armstrong: Ravioli with Ramps, Mushrooms, and Shaved Parmesan


I'm trying to find as many things to do with ramps as possible before the season ends.  I love the darn things.  I've seriously considered going out into the woods and looking for my own little patch.  Knowing my luck though, I'd probably only find my own little patch of poison ivy.  Guess I'll stick to the store.

Ravioli with Ramps, Mushrooms, and Shaved Parmesan
Adapted from Cathal Armstrong, Restaurant Eve in Alexandria, VA

1 (1-pound) package cheese or mushroom ravioli
1 teaspoon chopped garlic
2 tablespoons extra-virgin olive oil
4 thinly sliced ramp stalks
8 ounces crimini mushrooms, washed
1 (14½-ounce) can diced tomatoes, drained
Pinch red pepper flakes
2 tablespoons chicken broth
2 tablespoons unsalted butter
½ teaspoon chopped fresh thyme
Sea salt, to taste
3 tablespoons shaved Parmesan cheese

Bring a large saucepan of salted water to a boil. Cook the ravioli according to package directions. Drain well and set aside.

Meanwhile, in a medium saucepan over medium, sauté the garlic in the olive oil for about 2 minutes. Add the ramps, mushrooms, tomatoes, and red pepper flakes, then sauté for another 5 minutes, or until the mushrooms are tender.

Add the chicken broth. As soon as it bubbles, stir in the butter. Add the ravioli and toss to heat through. Add the thyme and salt, then divide between 4 serving bowls. Garnish with shaved Parmesan.

Makes 4 servings

Tuesday, May 19, 2009

The Zuni Café Cookbook: Ricotta Gnocchi

So when I saw the first challenge for the new Daring Cooks group, I couldn't help but groan. What is it with people and Italian food? Can we please cook something else? I hate Italian food. But like a good little daring foodie, I marched right out to the grocery store to round up some ricotta cheese. Unfortunately a trip to the farmer's market was not in my immediate future, so I had to make do with some Sargento ricotta. But I splurged and got full fat! That helps make up for the fact it was sitting on the shelf for at least a week before I bought it, right?

I had a frying pan full of tender turkey Italian sausage and sauteed shitake mushrooms in browned butter waiting for the gnocchi when they made it out of the cooking pot. I slapped them into the frying pan before they could disintegrate on me, only to find that despite a heavy hand with the butter, they insisted on sticking to the bottom of the frying pan. Boy, was I irked. I managed to scrape some off the pan and into a bowl for a nice beauty shot before trying some of my creation.

These things stopped me cold. What was in my mouth was very unpleasant. They were light and fluffy, but also slimy and strange. And immediately the perfect description came to me. It was like eating boogers. Nasty. Never again. My ricotta is staying in lasagna where it belongs.

Ricotta Gnocchi
From The Zuni Café Cookbook by Judy Rodgers

1 pound fresh ricotta (2 cups)
2 large cold eggs, lightly beaten
1 tablespoon unsalted butter
2 or 3 fresh sage leaves, chopped, or a few pinches of freshly grated nutmeg, or a few pinches freshly chopped lemon zest (all optional)
½ ounce Parmigiano-Reggiano, grated (about ¼ cup very lightly packed)
About ¼ teaspoon salt (a little more if using kosher salt)
All-purpose flour, for forming the gnocchi

To sauce the gnocchi:
8 tablespoons unsalted butter, sliced
2 teaspoons water

Testing the cheese (the day before you make the gnocchi):
Check the cheese for wetness. If you are lucky enough to have an individual basket-drained ricotta—you'll see the basket imprint or dimples on the cheese—it may be sitting in a little whey; in this case, slide it out of the container and wick away the surface moisture with a dry towel. With any ricotta, place about 2 teaspoons of the cheese on a dry paper towel and wait for about 1 minute. There will always be a little wet spot under and around the cheese, but if the cheese has thrown a wide ring of moisture, it is too wet to use as is. Place it in a strainer, or double-wrap in cheesecloth, and suspend over a deeper receptacle to drain for 8 to 24 hours, refrigerated. Cheesecloth is more efficient, as it also wicks moisture from the cheese while gravity does its job of draining. You can also speed up the draining operation by cinching the cheesecloth tight and squeezing some of the moisture from the ball of cheese.

Making the batter:
Beat the ricotta vigorously, then smash a little cheese against the side of the bowl with a soft rubber spatula. If you can still make out firm curds, press the cheese through a strainer to break them up. Stir in the eggs. Melt the 1 tablespoon of butter—with the chopped sage, if using—and add to the batter. Add the nutmeg or lemon zest, if using. Add the Parmigiano and salt and beat the whole mixture very well. This is what makes the gnocchi light. You should have a soft, fluffy batter.

Forming and testing a sample gnocchi:
Make a bed of flour about ½-inch deep in a shallow baking dish or on a sheet pan.

Scrape the sides of the bowl, mass the batter, and smooth its surface. Use a spoon held at an angle to shallow-scoop out 2 to 3 teaspoons of batter. Use your fingertip to push the almond-shaped scoop of batter cleanly from the bowl of the spoon onto the bed of flour. Shimmy the pan gently to coat the sides, then flip the gnocchi with your fingertip to coat the top. Lift from the flour and cradle and rock it in your palm. Don't squeeze it. You should have a dusty oval pod. As long as the general shape is uniform and rotund, don't worry that the gnocchi has a few wrinkles, dimples, and bumps.

To check the batter, poach this first gnocchi in a small pot of simmering well-salted water. It will initially sink, but will then swell, roll, and bob to the surface. Maintaining the quiet simmer, cook until the gnocchi is just firm, usually 3 to 5 minutes from the time it floats, depending on the cheese and the size of the gnocchi. Don't boil hard, or the gnocchi may explode. If, even at a gentle simmer, the gnocchi spreads or starts to decompose, the cheese was probably too wet. This can usually be corrected by beating a teaspoon or so of egg white into the remaining batter. If the batter was very fluffy, but the sample seems heavy, beat in about 1 teaspoon beaten egg. In either case, poach another sample to make sure the fix is successful.

Taste the sample for salt, and adjust the batter if needed.

Forming the remaining gnocchi:
Use the same spoon-and-finger technique to form the rest of the gnocchi. I usually form them in groups of 4 to 6, placing them all at the same angle, and a few inches apart, in the bed of flour, then shimmy the pan to coat all of them at once; don't leave them sitting too long in the flour, or they will absorb too much. Keep scraping the bowl and smoothing the surface of the batter to permit smooth scoops. As with the sample, roll each gnocchi in your hand. Arrange them on a sheet pan lined with a flour-dusted sheet of parchment paper or wax paper. Be sure that the individual gnocchi are not touching one another.

You can poach the gnocchi right away, but if you refrigerate them uncovered for about an hour, they will firm up, making them easier to cook and handle. (They will keep for up to 8 hours that way.)

Cooking the gnocchi:
Place the 8 tablespoons of butter and the 2 teaspoons of water in a 12-inch skillet; set aside.

Bring 2 to 3 quarts water to a simmer in a wide pan, 10 or more inches in diameter, so the gnocchi won't crush each other too much as they push to the surface. A sauté pan, flared brasier, or saucier pan will work, as long as it is at least 2 inches deep. Salt the water liberally—about 1 teaspoon per quart. Add the gnocchi one by one, adjusting the heat to maintain the simmer. Dip your fingertips in water if you find they are sticking to the gnocchi, but don't fret if the gnocchi stick a little to the paper. Do avoid holding the tray of gnocchi in the steam. Cook the gnocchi as you did the sample, until just firm, 3 to 5 minutes from the time they float.

Meanwhile, as soon as the gnocchi float to the surface, place the pan of butter and water over medium heat. Swirl the pan as the butter melts and begins to seethe. As soon as the butter is completely melted and has turned into an opaque pale yellow sauce, turn off the heat. Swirl the pan a few more times.

Lift the gnocchi out with a slotted spoon or skimmer, slide into the ready skillet, and roll in the warm butter sauce. Serve instantly in warm bowls.

Makes 4 to 6 servings

Monday, May 18, 2009

Joe's Stone Crab: Key Lime Pie


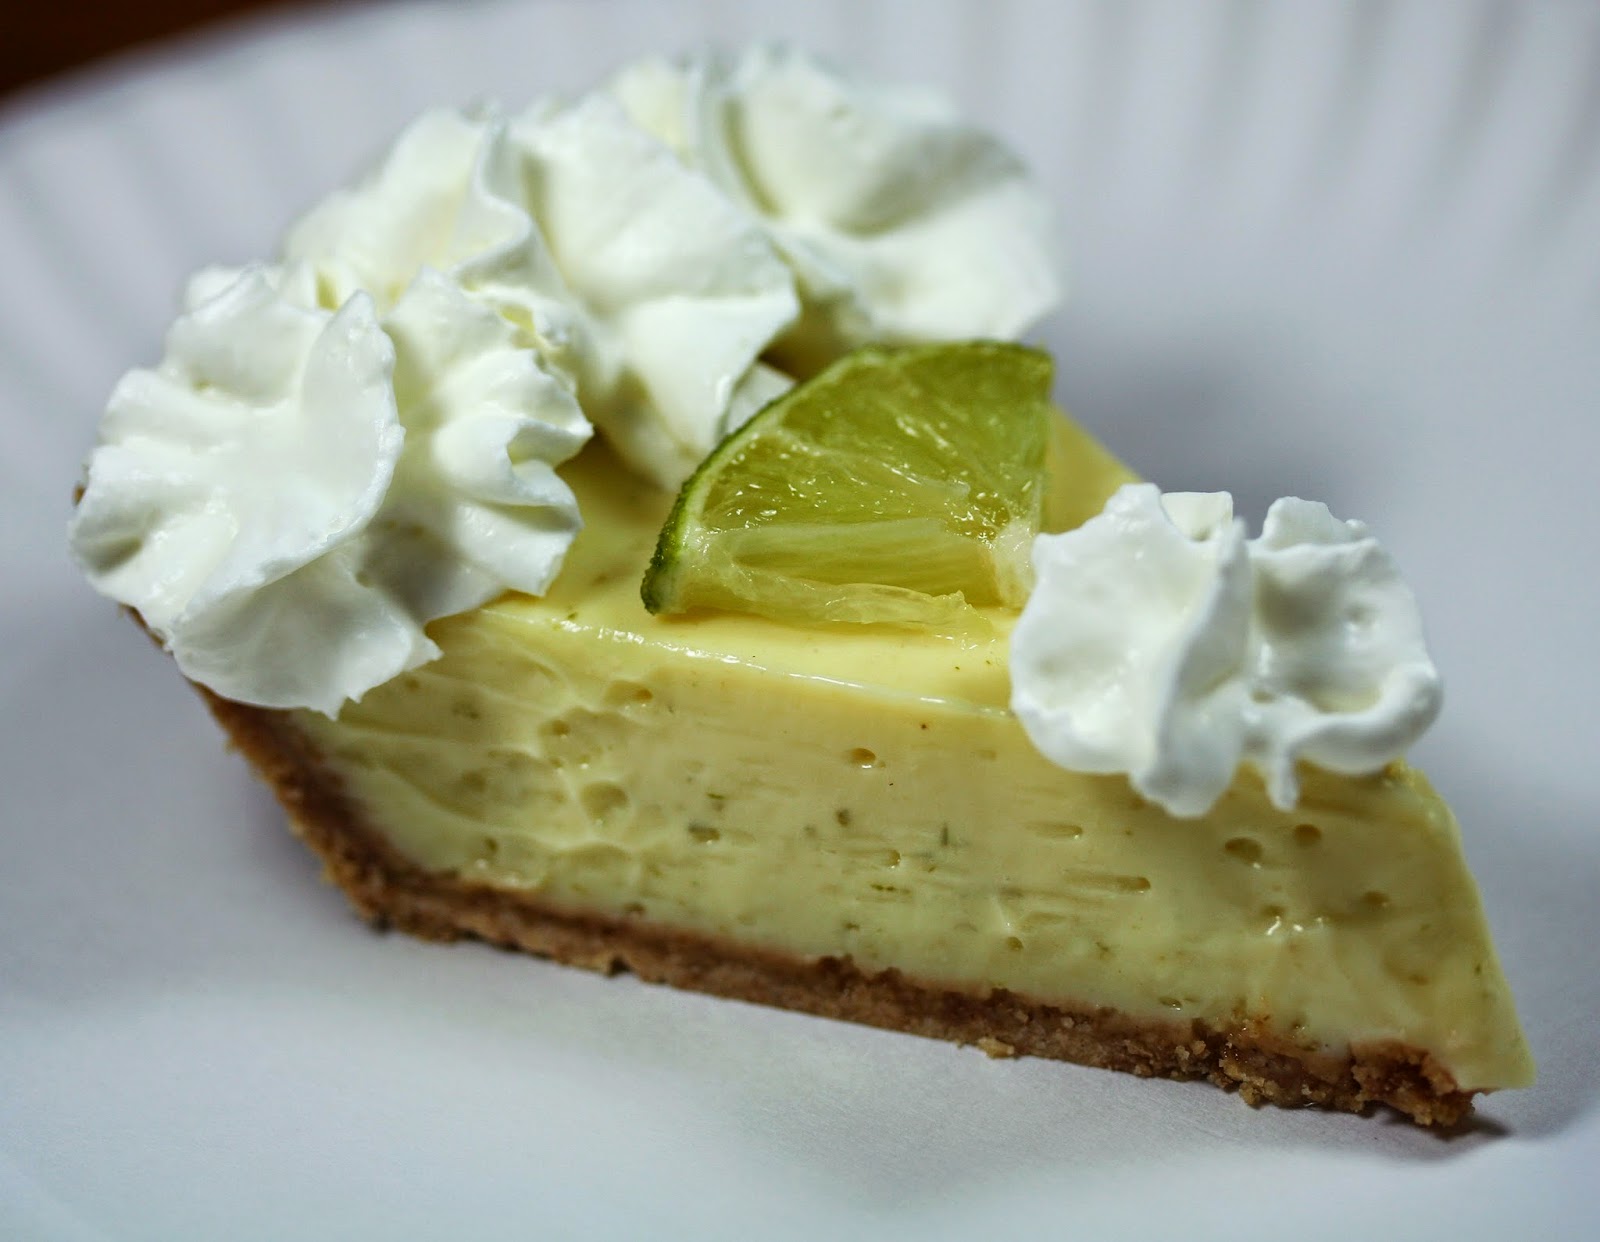
Pretty sad, but only a couple weeks after returning from Florida, I'm already wishing I hadn't come back. I really need the everyday sunshine to re-charge my batteries. And all the fabulous seafood and citrus isn't bad either.  Luckily for me, I brought back a bottle of key lime juice so I could make a nice little pie.

I cheated and ate some the same night. It was little soft, so I forced myself to wait until tonight to try another piece. The pie had weeped overnight, but I was able to clean it up and cut off the soggy portions, and it was much better. There was a small portion at the very center that was still a little soft, so I'm not sure if I'm a believer in the only-cook-it-for-10-minutes-or-you'll-ruin-it line. Next time I'll probably do 12.  Other than the weeping-filling-thing, the pie was delicious, nice and tart and refreshing. I highly recommend it.

Key Lime Pie
From Joe's Stone Crab restaurant in Miami, FL

Crust:
1 cup plus 2½ tablespoons graham cracker crumbs
5 tablespoons melted unsalted butter
⅓ cup granulated sugar

Filling:
3 large egg yolks
1½ teaspoons grated lime zest
1 (14-ounce) can sweetened condensed milk
⅔ cup freshly squeezed lime juice

Topping:
1 cup heavy or whipped cream, chilled
1 tablespoon powdered sugar

For the graham cracker crust:
Preheat the oven to 350°F. Butter a 9-inch pie pan. In a food processor, combine the graham cracker crumbs with the melted butter and sugar and pulse or stir until combined. Press the mixture into the bottom and sides of the pie pan, forming a neat border around the edge. Bake the crust until set and golden, 8 minutes. Set aside on a wire rack; leave the oven on.

For the filing:
Meanwhile, in an electric mixer with the wire whisk attachment, beat the egg yolks and lime zest at high speed until very fluffy, about 5 minutes. Gradually add the condensed milk and continue to beat until thick, 3 or 4 minutes longer. Lower the mixer speed and slowly add the lime juice, mixing just until combined, no longer. Pour the mixture into the crust. Bake for 10 minutes or until the filling has just set. Cool on a wire rack, then refrigerate. Freeze for 15 to 20 minutes before serving.

For the topping:
Whip the cream and the powdered sugar until nearly stiff. Cut the pie in wedges and serve very cold, topping each wedge with a large dollop of whipped cream.

Saturday, May 16, 2009

A Good Appetite: Creamy Sausage and Ramp Pasta

I never figured that moving to another state would mean also coming upon new foods.  I mean, I've been cooking for a while now.  How did I not hear about ramps??  Especially as delicious as they are.  They're like the perfect onion/leek/spring onion.  I think their season is so short just to torture me.

I'm not normally a pasta lover, but the ramps and cream and sausage in this dish just kinda work.  It's one of those lick-your-bowl-clean things.  But now I have to figure out how to get ramps if I move back to Texas...

Creamy Sausage and Ramp Pasta
Adapted from A Good Appetite blog

6 ounces fresh linguine
½ tablespoon olive oil
½ pound Italian sausage
10 ramps
⅔ cup half-and-half
¼ cup grated Parmesan cheese
Sea salt and freshly ground black pepper

Cook pasta according to directions on box.  When cooked, drain and set aside.

Meanwhile, heat the olive oil in a large skillet over medium-high heat.  Add the sausage and cook through.  Slice the ramps; bulbs, stems, and leaves, keeping the leaves separate from the bulbs and stems.  Add the bulbs and stems to the skillet and sauté for 2 to 3 minutes until slightly softened.  Add the half-and-half and cheese.  Bring to a simmer and stir for 1 minute.  Add the cooked pasta and ramp leaves.  Stir until the ramp leaves wilt slightly and everything is heated through.  Season with salt and pepper.

Makes 2 servings

Tuesday, May 12, 2009

Bon Appétit: Lemon and Blueberry Upside-Down Cake


This week my grocery store had a special on pints of blueberries. They looked pretty fresh, so I bought a package. It was only after I returned home that I realized I had no idea what to make them into, except that I didn't want the standard muffin.  And if you don't want a muffin, what do you do?  Make a cake.  The cake turns out deliciously moist and not too sweet, with the blueberries adding most of the sugar. It's delicious hot, with whipped cream, cold, or any other way you can think of to eat it..

Lemon and Blueberry Upside-Down Cake

¾ cup packed light brown sugar
1 cup (2 sticks) unsalted butter, divided use
1½ cups blueberries
¾ cup cake flour
¼ teaspoon baking powder
¼ teaspoon sea salt
4 ounces almond paste
½ cup granulated sugar
2 tablespoons finely grated lemon peel
1 tablespoon lemon juice, fresh squeezed
3 large eggs, at room temperature

Preheat oven to 350°F.

In a small saucepan, heat brown sugar and 1 stick of unsalted butter until butter melts and the sugar is incorporated. When mixture bubbles, pour into the bottom of a 9-inch round cake pan. Drop blueberries evenly over the top and press into the sugar mixture slightly.

Sift together cake flour, baking powder, and salt. Set aside.

In the bowl of a stand mixer, use a fork to break up the almond paste. Add the sugar, lemon peel, and lemon juice. Using the paddle attachment, mix on medium speed until almond paste is mostly broken down, and the mixture resembles crumbs. Add the remaining 1 stick of butter, 1 tablespoon at a time, still beating. When mixture is creamy and fully combined, add eggs, one at a time. Use a spatula to scrape the sides of the bowl and ensure everything is combined.

Add flour mixture, and mix until just combined. Use the spatula to scrape the sides again and ensure the batter is uniform. Scoop the batter over the blueberry mixture in the pan, and then even off the top of the batter. Put the cake pan on a baking sheet, and bake for 35 to 45 minutes, or until golden brown and a toothpick inserted in the center comes out clean.

Let the cake rest for approximately a minute before inverting onto a large plate. Wait 15-20 minutes before serving.

Thursday, May 07, 2009

The Best Casserole Cookbook Ever: Easy Tilapia Casserole


After all of the other casseroles I made from this cookbook that turned out in varying degrees of blah and boring, I'm not sure why I decided to give it one more shot.  Maybe I'm just a bad casserole recipe picker.  Maybe casseroles from the Midwest are supposed to be blah and boring.  Maybe my Texas tongue is betraying me.  Maybe this casserole needs some color and flavor, stat.  I recommend spinach.  Just 'cuz.

Easy Tilapia Casserole
From The Best Casserole Cookbook Ever by Beatrice Ojakangas

2 tablespoons unsalted butter, melted, plus extra for the dish
1 pound tilapia fillets
Sea salt and freshly ground black pepper
1 (1-pound) package potato gnocchi
2 dashes Tabasco sauce
1⅓ cups heavy cream, or 1 (10¾-ounce) can cream of shrimp soup
¼ cup grated Parmesan cheese
¼ cup panko or fine dry breadcrumbs

Preheat the oven to 350°F.

Rinse the tilapia and pat dry.  Sprinkle with salt and pepper.

Spread the gnocchi in an even layer in the casserole.  Add the Tabasco to the cream or soup and drizzle half over the gnocchi.  Top with the fish fillets in one layer, overlapping if necessary.  Spread the remaining cream over the fish.  Mix the Parmesan, panko, and 2 tablespoons melted butter in a small dish and sprinkle over the fish evenly.

Bake, uncovered, for 30 to 35 minutes, until the casserole is bubbly and the fish flakes.

Makes 4 servings

Tuesday, May 05, 2009

Emeril Lagasse: White Chocolate Macadamia Nut Blondies


I've tried many different recipes for blondies, but they never seem to live up to my perfect ideal: soft, chewy, and sweet, with a flaky top. Basically a vanilla brownie. Because isn't that what a blondie is supposed to be? And I never mind the addition of white chocolate and macadamia nuts.  This recipe appears to be what I was looking for, but I will admit that trying to stir 3 cups of flour into a resistant batter by hand was NOT FUN.

White Chocolate Macadamia Nut Blondies
From Emeril Lagasse

1 cup (2 sticks) plus 1 teaspoon unsalted butter, at room temperature
1½ cups packed light brown sugar
2 large eggs
1 tablespoon pure vanilla extract
3 cups plus 1 tablespoon all-purpose flour
1 teaspoon baking powder
2 cups white chocolate chips
1 cup macadamia nuts, toasted and roughly chopped

Preheat oven to 350°F.

In the bowl of an electric mixer fitted with the paddle attachment, cream 2 sticks of butter and sugar on medium speed until light and fluffy. While machine is running, add eggs and vanilla and mix until incorporated.

Sift together 3 cups flour and baking powder. Slowly add flour mixture to batter and mix on low speed just until a dough is formed. Very gently, by turning the mixer on and then off, fold chips and nuts into dough.

Once dough is blended, grease a 9x9-inch baking pan with remaining 1 teaspoon butter and dust with 1 tablespoon flour. Pour batter into pan and place in preheated oven. Bake for 25 to 30 minutes, or until set yet still moist.

Set aside to cool completely before cutting into squares.

Tuesday, April 14, 2009

Various Sources: Kyuri no Tataki (Beaten Cucumber), Kabocha no Nimono (Sake Simmered Kabocha Squash), Asparagasu no Goma Ae (Asparagus with Sesame), Horensou no Ohitashi (Spinach with Bonito), Tōsutogoma Shio to Uzura no Tamago (Quail Eggs with Toasted Sesame Salt)


I've always loved bentos. There's something about the fact that so many little tidbits are packed into such a small container. You get so many different choices and flavors, all in one neat package.

Well, I just went to a Japanese grocery store near me for the first time, so I stocked up on all sorts of fabulous goodies. It also seems like fate, since a couple of days before, I happened to pick up a couple of Japanese cookbooks that I liked. So with a full refrigerator and some great inspiration, I decided to make some side dishes for a great little bento to accompany my curry rice main dish.

In the picture, clockwise from the top, I made braised kabocha squash, "beaten" cucumbers, asparagus with sesame seeds (I was out of sesame seeds of course), quail eggs with toasted sesame salt, and spinach with bonito flakes.

Kabocha no Nimono (Sake Simmered Kabocha Squash)
From Debra Samuels

1 small or ½ medium kabocha squash
1 cup dashi stock
2 tablespoons granulated sugar
1 tablespoon sake
2 tablespoons soy sauce
Dash of sea salt

Wash the squash and cut in half. With a spoon, scrape out the seeds and stringy parts of the squash.  Cut the squash into 2-inch chunks (they don’t have to be uniform), leaving the skin on.

In a medium saucepan, add the dashi stock and turn on heat to medium-high.  Add squash to the pan in one layer and then add the sugar and sake.  Cut a piece of parchment paper to fit just inside the pan (or use a wooden drop lid). Press atop the squash and simmer for about 10 minutes, until the squash is soft (a toothpick should go into the squash easily) and the liquid is almost entirely absorbed.

Add the soy sauce and salt and stir to coat the squash. Simmer an additional 2 minutes, covered again with the parchment (or drop lid).  Remove from the pan and use the reduced pan liquid as a glaze to brush on the cooked squash.

Kyuri no Tataki (Beaten Cucumber)
From Harumi Kurihara

3 Japanese cucumbers or 5 Persian cucumbers, ends trimmed
Scant ¼ cup (50ml) shoyu (soy sauce)
Scant ¼ cup (50ml) rice vinegar
2 tablespoons granulated sugar
1½ teaspoons sesame oil
A couple pinches red pepper flakes

In a medium bowl, combine the shoyu, vinegar, sugar, and sesame oil. Whisk until sugar has dissolved and set aside.

With a rolling pin, smash the cucumbers, then cut into bite-sized pieces. Put the cucumbers in a plastic bag and pour in the shoyu mixture. Add the red pepper flakes and squeeze the air out as much as you can and seal the bag. Massage a bit, then place in the refrigerator for 2–3 hours.

Asparagasu no Goma Ae (Asparagus with White Sesame Seeds)
Adapted from Just Hungry blog

About 20 medium-thick asparagus stalks
3 tablespoons white sesame seeds
1 tablespoon granulated sugar
2 teaspoons mirin
2 tablespoons soy sauce

Trim the hard woody part off the base of the asparagus stalks. Cut the stalks in approximately 2-inch long pieces.

Bring a pan of slightly salted water to boil. Put in the asparagus stalk pieces in first, reserving the tips. Cook until bright green and still slightly crisp, a couple of minutes. Add the reserved asparagus tips and cook an additional couple of minutes. Drain, and blanch briefly in cold water. Drain well and set aside.

Roast the sesame seeds in a small dry frying pan over medium-high heat until the seeds start to pop. Immediately remove and leave a couple of minutes to let cool. Add the sugar, mirin, and soy sauce to the sesame seeds. Toss with the asparagus and serve.

Tōsutogoma Shio to Uzura no Tamago (Quail Eggs with Toasted Sesame Salt)
Adapted from Gourmet magazine, April 1999

¼ cup sesame seeds
Heaping ¼ teaspoon coarse salt
16 quail eggs

Preheat oven to 350°F.

In a baking pan spread seeds evenly and toast, stirring once halfway through toasting, until deep golden, about 12 minutes. Cool seeds and in a food processor pulse with salt until coarsely ground. Sesame salt may be made 2 weeks ahead and kept, covered, at room temperature.

In a saucepan cover eggs with cold water by 1 inch and bring just to a boil. Remove pan from heat and let eggs stand, covered, for 7 minutes. Drain water from pan and run cold water over eggs, cracking shells against side of pan. Peel eggs. Serve eggs with salt.

Makes 4 servings

Horensou no Ohitashi (Spinach with Bonito Flakes)
From Setsuko Yoshizuka

1 pound fresh spinach, washed
2 tablespoons soy sauce
¼ cup dashi stock
½ cup katsuobushi (dried bonito flakes)

Boil lots of water in a large pot. Add a pinch of salt in the water. Put spinach in the boiling water from the stem side. Boil spinach for about one minute. Drain and soak the spinach in water to cool. Drain and squeeze the spinach to remove the excess liquid. Cut spinach into about 1 inch lengths. Serve spinach in a large bowl or into individual small bowls. Pour mixture of soy sauce and dashi over the spinach. Sprinkle katsuobushi on top.

Makes 4 servings

Sunday, March 29, 2009

The Splendid Table: Lasagne Verdi all'Emiliana (Spinach Lasagne of Emilia-Romagna)


Apparently I'm bored, because I decided I wanted to make a lasagne with fresh spinach pasta. I mean, I have never made pasta before. And my history with lasagne always involved no-boil dried noodles and plastic tubs of ricotta cheese. This lasagne had neither. And of course it also gave me an excuse to order a Marcato Atlas 150 pasta machine with a motor to go on the side.  New toy!

Everything came together really well (after about two days of slaving in the kitchen). The pasta was amazing...soft, tender, and nothing like the reconstituted dried noodles that I normally use. The rest of the sauces I wasn't a huge fan of. I'm more of a ricotta and tomato sauce girl, but at least I have a new toy to play with.

Lasagne Verdi all'Emiliana (Spinach Lasagne of Emilia-Romagna)
From The Splendid Table by Lynne Kasper

10 quarts salted water
1 recipe Spinach Pasta cut for lasagna (recipe follows)
1 recipe Béchamel Sauce (recipe follows)
1 recipe Country Style Ragu (recipe follows)
1 cup (4 ounces) freshly grated Parmigiano-Reggiano

Have all the sauces, rewarmed gently over a medium heat, and the pasta at hand. Have a large perforated skimmer and a large bowl of cold water next to the stove. Spread a double thickness of paper towels over a large counter space. Preheat the oven to 350°F. Oil or butter a 3-quart shallow baking dish.

Bring the salted water to a boil. Drop about four pieces of pasta in the water at a time. Cook about 2 minutes. If you are using dried pasta, cook about 4 minutes, taste, and cook longer if necessary. The pasta will continue cooking during baking, so make sure it is only barely tender. Lift the lasagne from the water with a skimmer, drain, and then slip into the bowl of cold water to stop cooking. When cool, lift out and dry on the paper towels. Repeat until all the pasta is cooked.

Spread a thin layer of béchamel over the bottom of the baking dish. Arrange a layer of about four overlapping sheets of pasta over the béchamel. Spread a thin layer of béchamel (about 3 or 4 spoonfuls) over the pasta, and then an equally thin layer of the ragu. Sprinkle with about 1½ tablespoons of the béchamel and about ⅓ cup of the cheese. Repeat the layers until all ingredients are used, finishing with béchamel sauce and topping with a generous dusting of cheese.

Cover the baking dish lightly with foil, taking care not to let it touch the top of the lasagne. Bake 40 minutes, or until almost heated through. Remove the foil and bake another 10 minutes, or until hot in the center (test by inserting a knife – if it comes out very warm, the dish is ready). Take care not to brown the cheese topping. It should be melted, creamy looking and barely tinged with a little gold. Turn off the oven, leave the door ajar and let the lasagne rest for about 10 minutes. Then serve. This is not a solid lasagne, but a moist one that slips a bit when it is cut and served.

Spinach Egg Pasta (Pasta Verde)
2 jumbo eggs
10 ounces fresh spinach, rinsed dry, and finely chopped; or 6 ounces frozen chopped spinach, defrosted and squeezed dry
3½ cups all-purpose flour

Mound the flour in the center of your work surface and make a well in the middle. Add the eggs and spinach. Use a wooden spoon to beat together the eggs and spinach. Then gradually start incorporating shallow scrapings of flour from the sides of the well into the liquid. As you work more and more flour into the liquid, the well’s sides may collapse. Use a pastry scraper to keep the liquids from running off and to incorporate the last bits of flour into the dough. Don’t worry if it looks like a hopelessly rough and messy lump.

With the aid of the scraper to scoop up unruly pieces, start kneading the dough. Once it becomes a cohesive mass, use the scraper to remove any bits of hard flour on the work surface – these will make the dough lumpy. Knead the dough for about 3 minutes. Its consistency should be elastic and a little sticky. If it is too sticky to move easily, knead in a few more tablespoons of flour. Continue kneading about 10 minutes, or until the dough has become satiny, smooth, and very elastic. It will feel alive under your hands. Do not shortcut this step. Wrap the dough in plastic wrap, and let it relax at room temperature 30 minutes to 3 hours.

If using an extra-long rolling pin work with half the dough at a time. With a regular-length rolling pin, roll out a quarter of the dough at a time and keep the rest of the dough wrapped. Lightly sprinkle a large work surface with flour. The idea is to stretch the dough rather than press down and push it. Shape it into a ball and begin rolling out to form a circle, frequently turning the disc of dough a quarter turn. As it thins outs, start rolling the disc back on the pin a quarter of the way toward the center and stretching it gently sideways by running the palms of your hands over the rolled-up dough from the center of the pin outward. Unroll, turn the disc a quarter turn, and repeat. Do twice more.

Stretch and even out the center of the disc by rolling the dough a quarter of the way back on the pin. Then gently push the rolling pin away from you with one hand while holding the sheet in place on the work surface with the other hand. Repeat three more times, turning the dough a quarter turn each time.

Repeat the two processes as the disc becomes larger and thinner. The goal is a sheet of even thickness. For lasagne, the sheet should be so thin that you can clearly see your hand through it and see colours. Cut into rectangles about 4x8 inches. Note: Transparency is a crucial element of lasagne pasta and the dough should be rolled as thinly as possible.

Dry the pasta at room temperature and store in a sealed container or bag.

Béchamel
4 tablespoons unsalted butter
4 tablespoons all-purpose flour
2⅔ cups whole milk
Salt and freshly ground pepper to taste
Freshly grated nutmeg to taste

Using a medium-sized saucepan, melt the butter over low to medium heat. Sift over the flour, whisk until smooth, and then stir (without stopping) for about 3 minutes. Whisk in the milk a little at a time and keep the mixture smooth. Bring to a slow simmer, and stir 3 to 4 minutes, or until the sauce thickens. Cook, stirring, for about 5 minutes, until the sauce thickens. Season with salt, pepper, and a hint of nutmeg.

Country Style Ragu (Ragu alla Contadina)
3 tablespoons extra virgin olive oil
2 ounces pancetta, finely chopped
1 medium onion, minced
1 medium rib celery with leaves, minced
1 small carrot, minced
4 ounces boneless veal shoulder or round
4 ounces pork loin, trimmed of fat, or 4 ounces mild Italian sausage (made without fennel)
8 ounces beef skirt steak, hanging tender, or boneless chuck blade or chuck center cut (in order of preference)
1 ounce thinly sliced Prosciutto di Parma
⅔ cup dry red wine
1½ cups chicken or beef stock (homemade if possible)
2 cups whole milk
3 canned plum tomatoes, drained
Salt and freshly ground black pepper to taste

Heat the olive oil in a 12-inch skillet (frying pan) over medium-high heat. Have a large saucepan handy to use once browning is complete. Add the pancetta and minced vegetables and sauté, stirring frequently with a wooden spoon, 10 minutes, or until the onions barely begin to color. Coarsely grind all the meats together, including the prosciutto, in a food processor or meat grinder. Stir into the pan and slowly brown over medium heat. First the meats will give off a liquid and turn dull grey but, as the liquid evaporates, browning will begin. Stir often, scooping under the meats with the wooden spatula. Protect the brown glaze forming on the bottom of the pan by turning the heat down. Cook 15 minutes, or until the meats are a deep brown. Turn the contents of the skillet into a strainer and shake out the fat. Turn them into the saucepan and set over medium heat.

Add the wine to the skillet, lowering the heat so the sauce bubbles quietly. Stir occasionally until the wine has reduced by half, about 3 minutes. Scrape up the brown glaze as the wine bubbles. Then pour the reduced wine into the saucepan and set the skillet aside.

Stir ½ cup stock into the saucepan and let it bubble slowly, 10 minutes, or until totally evaporated. Repeat with another ½ cup stock. Stir in the last ½ cup stock along with the milk. Adjust heat so the liquid bubbles very slowly. Partially cover the pot, and cook 1 hour. Stir frequently to check for sticking.

Add the tomatoes, crushing them as they go into the pot. Cook uncovered, at a very slow bubble for another 45 minutes, or until the sauce resembles a thick, meaty stew. Season with salt and pepper.